Methods of lateral viewing with a borescope and their respective characteristics

1.Methods of Lateral Viewing with a Borescope


There are primarily two methods of lateral viewing using a borescope. I will introduce the characteristics of each method.


◆ Utilizing a lateral (90°) viewing borescope


The lateral viewing type of borescope, characterized by an optical path arranged in a single direction, may exhibit uneven brightness across the observed surface due to its directional lighting configuration.


光路が一方向状に配置   観察面の明るさはアンバランスが発生
  • The optical path is arranged unidirectionally.
 

Imbalance in brightness occurs across the observation surface


Additionally, since the illumination is not ring-shaped but directional, uneven brightness may occur on the screen when observing reflective objects.


◆ Covering a direct-view borescope with a side-view tube (side-view adapter).


– A side-view tube (side-view adapter) is an accessory designed for enabling lateral viewing with a direct-view borescope. Simply fitting it over the tip allows for easy lateral observation.

– Note: The diameter of the side-view tube (side-view adapter) for a φ4mm borescope is φ5.5mm, which makes it slightly thicker.


ボアスコープ(工業用硬性鏡)の側視アダプタ


ボアスコープ側視管装着イメージ   – Image of a Side-View Tube (Side-View Adapter) Installation


– The advantage of the side-view tube (side-view adapter) is that it can be rotated while attached, allowing for easy observation of a 360° field of view.


ボアスコープ(工業用硬性鏡)の側視アダプタ


– The disadvantage is that the edges of the mirror are visible, preventing the use of the entire field of view.


ミラーのエッジ


– Using a direct-view type results in ring-shaped illumination. Additionally, the mirror is more susceptible to the effects of dust and dirt (reflections).。


2. When connecting a camera to a borescope.


– When connecting a camera, the differences in this method significantly impact the results, as cameras generally have a lower dynamic range than the human eye.


側視タイプのボアスコープ 直視タイプのボアスコープ
   
– Advantages and Disadvantages of Lateral Viewing Type – Advantages and Disadvantages of Direct-Viewing Type
– Bright and dark areas occur on the same surface.
– In the presence of lateral holes, the walls and bottom surfaces of these holes will be shadowed.
– When observing the same surface, the central area appears bright while the periphery remains dark.
– Light also reaches the walls and bottom surfaces of lateral holes.
– The edges of the mirror are reflected in the view.
– The attachment and removal of the side-view tube allow for both direct and lateral observation.


– However, depending on the reflectivity and shape of the object, the lateral viewing type may provide a clearer view.


側視タイプ 直視タイプ+側視管
<Lateral Viewing Type>
・The observation surface is easier to see.。

<Direct Viewing Type with Side-View Tube>

・Illumination is reflected in the central area.


3. Recommended Camera Feature for Borescope Observation: “WDR (HDR)”


Our company recommends cameras with WDR (HDR) functionality for borescope use.

WDR (HDR) stands for Wide Dynamic Range (High Dynamic Range), a feature that expands the camera’s dynamic range.

Below is an image taken with a camera equipped with WDR functionality connected to a side-view type borescope.


カメラのダイナミックレンジを広げる機能(WDR)とボアスコープ


The “Lateral Viewing (90°) Type” and “Direct Viewing Type” borescopes introduced here are available through our company.

For more details, please visit the product pages below.

The camera system can be utilized for inspecting the interior walls of engine cylinders or cans.

I have compiled an overview of a camera system that can be utilized for inspecting the interior walls of engine cylinders or cans. I will present actual captured images, as well as the merits and drawbacks associated with each application.


<SAMPLE>

Given the difficulty in obtaining engine cylinders, we conducted tests using aluminum cans for this study. The dimensions of the aluminum can were φ100mm×H130mm. We inscribed numbers from 1 to 5 on the interior wall and introduced several scratches in various locations.


アルミ缶


<CAMERA>

Methods 1 to 5 utilized our company’s full high-definition camera. The details of the camera used can be found here. By standardizing the camera, we were able to conduct a pure comparison of lenses. Additionally, for method 6, we employed an S-mount UVC camera as an additional edition.


<INSPECTION METHODS AND RESULTS>


1. Method for inspecting the entire circumference of the inner wall in one shot using a wide-bore scope.


1. Wide-bore scope: φ4mm
2. Flat dome-type illumination: DC-30D-127W-CH1
3. Illumination for borescope: LED-3WDB


アルミ缶  

Left: Scene of the capture
Right: Magnification of the insertion part

The borescope can be observed slightly protruding from the entrance of the can. Due to the distance and proximity to the bottom, visibility of scratches near the depths is reduced.

     
ボアスコープで撮影  

The borescope was positioned slightly away from the entrance to capture the entire area within a single frame.

     
アルミ缶  

To magnify the view, the borescope was slightly inserted from the entrance and captured.


The operability is rated at ★4 due to the ability to confirm the entire circumference of the inner wall in one shot.

The visibility level of scratches is rated at ★3.


2. Method for inspection using a 90° side-view borescope (φ4mm) (requires rotation of the bore).


1. Borescope: φ4mm, 90° side-view
2. Flat dome-type illumination: DC-30D-127W-CH1
3. Illumination for borescope: LED-3WDB


アルミ缶  

Scene of the capture:

The borescope is inserted into the can.

Rotating the bore is necessary for complete circumference inspection (requires rotating the camera).

Additionally, during magnification, the entire top-to-bottom view cannot be observed in a single frame, necessitating vertical movement.

     
アルミ缶  

To ensure the entire height fits within one frame, the borescope was positioned slightly away from the inner wall for the capture.

     
アルミ缶  

To magnify the view, the borescope was brought close to the inner wall for the capture.


Rotating the bore is necessary for inspecting the entire circumference of the inner wall, requiring rotation of the camera itself, resulting in a usability rating of ★2.

The visibility level of scratches is rated at ★4.


3. Method for inspection using a 90° side-view (interchangeable tip) rotatable borescope (φ8mm) (requires rotation of the bore).


1. Rotatable borescope (interchangeable tip): φ8mm, 90° side-view
2. Flat dome-type illumination: DC-30D-127W-CH1
3. Illumination for borescope: LED-3WDB


アルミ缶  

Scene of the capture:

The borescope is inserted into the can. While rotation of the bore is necessary for complete circumference inspection, the rotatable borescope features an interchangeable tip that allows rotation of the tip tube, eliminating the need for camera rotation.

     
アルミ缶の撮影  

The borescope was positioned away from the inner wall for the capture, but capturing the entire top-to-bottom view in one frame proved challenging, necessitating slight vertical movement.

     
アルミ缶の撮影  

To magnify the view, the borescope was brought close to the inner wall for the capture.


For inspecting the entire circumference of the inner wall, rotation of the bore is unnecessary with the rotatable borescope. However, vertical movement is required, resulting in a usability rating of ★3.

The visibility level of scratches is rated at ★4.


4. Method for inspecting the entire circumference of the inner wall in one shot using a microscope for observing hole walls.


 1. Microscope for observing hole walls (for diameters ranging from φ20mm to φ120mm): PH200BA-D30


アルミ缶の撮影  

Left: Scene of the capture

Right: Product photograph


The lens is positioned near the entrance (no need to insert into the can), allowing for a complete circumference inspection of the can interior in one shot.

Visibility is reasonably good.

Since there’s no need to insert the lens portion into the can, the risk of damaging the sample is low.

     
アルミ缶の撮影  

To ensure the entire area fits within one frame, the lens was positioned slightly away from the entrance for the capture.

     
アルミ缶の撮影  

To magnify the view, the lens was positioned at the very edge of the entrance, but it’s not particularly suited for magnification.

Operability is rated at ★4 due to the ability to confirm the entire circumference of the inner wall in one shot.

The visibility level of scratches is also rated at ★4.


5. Method for inspection using a high-magnification lens with a 90° side-view mirror attached to the tip (requires rotation of the lens).


1. High-magnification lens: FZ lens
2. Custom-made 90° side-view mirror attached to the tip of the lens
3. Custom-made LED illumination for attaching the 90° side-view mirror


高倍率レンズ先端に90°側視ミラーを取付ける方法  

Left: Scene of the capture

Right: Magnification of the insertion part

The lens is fully inserted into the can for observation.

     
高倍率レンズ先端に90°側視ミラーを取付ける方法  

Minimum magnification: Approximately 40 times

     
高倍率レンズ先端に90°側視ミラーを取付ける方法  

Maximum magnification: Approximately 200 times

Mainly focused on magnified observation, the visible area at once is narrow, making it difficult to navigate, resulting in a usability rating of ★1.

The visibility level of scratches is rated at ★5.

However, it’s worth noting that for scratch detection purposes, this method may not be practical, and it’s primarily intended for magnified observation purposes.


6. [Special Edition] Method for inspecting the entire circumference of the inner wall in one shot using an S-mount camera and fisheye lens.


 1. UVC camera
2. Fisheye lens
3. Flat dome-type illumination: DC-30D-127W-CH1


魚眼レンズ  

A fisheye lens is attached to a tube camera with interchangeable lenses. This allows for both direct viewing and side-view observation simultaneously.。


* With a lens diameter of 28mm, unlike borescopes, it cannot observe narrow objects.

* Additionally, it is not suitable for deep holes.

魚眼レンズ  

Capturing the image slightly away from the entrance of the can.

     
魚眼レンズ  

Capturing the image right at the entrance of the can.

Operability is rated at ★4 due to the ability to confirm the entire circumference of the inner wall in one shot.

The visibility level of scratches is rated at ★3.

However, it’s worth noting that the visibility can vary significantly depending on how the lighting is applied, resulting in extreme contrasts between bright and dark areas.


<Summary>


When observing inner walls, it’s essential to select a camera system that aligns with your budget and intended purpose.

Considering usability is also recommended during the evaluation process.


Selecting a camera system based on your specific application. Recommended camera systems:


If you aim to inspect the entire circumference of the inner wall in one shot for scratch detection purposes:


4. Method for inspecting the entire circumference of the inner wall in one shot using a microscope for observing hole walls.


– The PH200BA-D30 microscope for observing hole walls (for diameters ranging from φ20mm to φ120mm) is recommended.


If you desire magnified observation of scratches:

5. Method for inspection using a high-magnification lens with a 90° side-view mirror attached to the tip (requires rotation of the lens) is recommended.


If you want to ensure comprehensive observation without missing any area in the 90° inner wall direction:


3. Method for inspection using a 90° side-view (interchangeable tip) rotatable borescope (φ8mm) (requires rotation of the bore) is recommended.


– The components mentioned, including the interchangeable tip rotatable borescope (φ8mm, 90°), flat dome-type illumination (DC-30D-127W-CH1), and illumination for borescope (LED-3WDB), are recommended.


If you want to observe both the bottom and inner walls with a single device:

1. Method for inspecting the entire circumference of the inner wall in one shot using a wide-angle borescope is recommended.


If price is a primary consideration:


6. [Special Edition] Method for inspecting the entire circumference of the inner wall in one shot using an S-mount camera and fisheye lens is recommended.

A camera system that can be used for inspecting the inner wall of engine cylinders or the inner wall of cans

I’ve summarized the camera systems that can be used for inspecting engine cylinder walls or can walls. I’ll introduce them with actual images, as well as their respective merits and drawbacks.


●Test conditions


<Sample>

Since engine cylinders are difficult to obtain, we conducted the test using aluminum cans this time.
The size of the aluminum can is φ100mm × H130mm.
We marked numbers 1 to 5 on the inner wall.
We made scratches in several places.


アルミ缶


<Camera>


Methods 1 to 5 used our full high-definition camera. ⇒ Camera used here
By using the same camera, we can compare the lenses purely.
*For method 6, we used an S-mount UVC camera as a special edition.


●Inspection Method and Results


1. Method for inspecting the entire circumference of the inner wall in one shot using a wide bore scope


 ①ワイドボアスコープ φ4mm ボアスコープ 0°
 ②平型ドーム式照明 DC-30D-127W-CH1
 ③ボアスコープ用照明 LED-3WDB


アルミ缶  

Left: Shooting Scene

Right: Insertion Port Enlarged

The borescope can be observed slightly away from the entrance of the can.

There is a distance, and scratches close to the bottom are less visible.

     
ボアスコープで撮影  

The borescope is positioned slightly away from the entrance to capture the entire area in a single frame.

     
アルミ缶  

Position the borescope slightly inside the entrance to capture an enlarged view.


The operability is rated at ★4 since the entire circumference of the inner wall can be checked in one shot.

The visibility level of scratches is rated at ★3.


Method 2: Inspection using a 90° side-view borescope (φ4mm) (Requires bore rotation)


 ①ボアスコープ φ4mm ボアスコープ 90°

 ②平型ドーム式照明 DC-30D-127W-CH1

 ③ボアスコープ用照明 LED-3WDB


アルミ缶  

Shooting Scene

The borescope is inserted into the can.

Rotating the bore is necessary to inspect the entire circumference (requires rotating the camera along with the bore).

Additionally, when enlarging, the top and bottom cannot be observed in a single frame, requiring vertical movement as well.

     
アルミ缶  

Position the borescope slightly away from the inner wall to capture the entire height in a single frame.

     
アルミ缶  

Bring the borescope close to the inner wall to capture an enlarged view.


If inspecting the entire circumference of the inner wall, bore rotation is necessary, requiring rotation of the camera as well, thus rated at ★2 for operability.

However, the visibility level of scratches is rated at ★4.


3. Method: Inspection using a 90° side-view (interchangeable tip) swivel borescope (φ8mm) (Requires bore rotation)


 ①(先端交換式)くるっとボアスコープ φ8㎜ 90°

 ②平型ドーム式照明 DC-30D-127W-CH1

 ③ボアスコープ用照明 LED-3WDB


アルミ缶  

Shooting Scene

The borescope is inserted into the can.

To inspect the entire circumference, bore rotation is necessary, but since it’s a swivel borescope, the tip tube can be rotated.

(Camera rotation is not required)

     
アルミ缶の撮影  

The borescope was positioned away from the inner wall for the shot, but capturing the top and bottom in a single frame is not possible, so some vertical movement is required.

     
アルミ缶の撮影  

Bring the borescope close to the inner wall to capture an enlarged view.


If inspecting the entire circumference of the inner wall, a swivel borescope eliminates the need for camera rotation, but vertical movement is necessary, rated at ★3 for operability.

However, the visibility level of scratches is rated at ★4.


4. Method: Inspecting the entire circumference of the inner wall in one shot using a microscope for observing hole walls


 ①穴内壁観察用マイクロスコープ(φ20mm~120mm用) PH200BA-D30


アルミ缶の撮影  

Left: Shooting Scene

Right: Product Photo


The lens is positioned near the entrance (no need to insert into the can) to allow for a one-shot inspection of the entire circumference inside the can.

Visibility is reasonably good.

Since there’s no need to insert the lens portion into the can, the risk of damaging the sample is low.

     
アルミ缶の撮影  

Position the lens slightly away from the entrance to capture the entire area in a single frame.

     
アルミ缶の撮影  

Capture the image with the lens positioned right at the entrance, allowing for maximum magnification.

However, it’s not particularly suitable for significant magnification.


Operability is rated at ★4 since the entire circumference of the inner wall can be checked in one shot.

The visibility level of scratches is also rated at ★4.


5. Method: Inspection using a high-magnification lens with a 90° side-view mirror attached to the tip (Requires lens rotation)


1. High-magnification lens: FZ lens
2. Custom-made: 90° side-view mirror attached to the tip of the lens
3. Custom-made: LED illumination for attaching the 90° side-view mirror


高倍率レンズ先端に90°側視ミラーを取付ける方法  

Left: Shooting Scene

Right: Insertion Port Enlarged

The lens is fully inserted into the can for observation.

     
高倍率レンズ先端に90°側視ミラーを取付ける方法  

Minimum magnification: Approximately 40x

     
高倍率レンズ先端に90°側視ミラーを取付ける方法  

Maximum magnification: Approximately 200x

Operability is rated at ★1 because the main focus is on magnification, and the visible area at once is narrow, making it difficult to search.

However, the visibility level of scratches is rated at ★5.

It’s worth noting that while it’s not very practical for scratch detection purposes, it’s primarily intended for magnification observation.


6. [Special Edition] Method for inspecting the entire circumference of the inner wall in one shot using an S-mount camera and fisheye lens


1. UVC camera
2. Fisheye lens
3. Flat dome-type lighting DC-30D-127W-CH1


魚眼レンズ  

Attach a fisheye lens to a tube camera with interchangeable lenses.

This allows for side-view observation while maintaining direct viewing.


* Since the lens diameter is 28mm, it cannot observe small-diameter objects like borescopes.

It’s also not suitable for deep holes.


魚眼レンズ  

Capture the image with the camera positioned slightly away from the entrance of the can.

     
魚眼レンズ  

Capture the image with the camera positioned right at the entrance of the can.

Operability is rated at ★4 since the entire circumference of the inner wall can be checked in one shot.

The visibility level of scratches is rated at ★3.

However, the visibility greatly varies depending on how the lighting is applied, resulting in extreme differences between bright and dark areas.


Summary:


When observing inner walls, it’s essential to choose a camera system that fits your budget and purpose.

Considering operability is also recommended during the evaluation process.


Recommended camera systems to choose from based on usage


<If you want to check the entire circumference inside the can in one shot for the purpose of finding scratches>

4. Method for inspecting the entire circumference of the inner wall in one shot using a microscopewith an aperture wall observation function.

① The aperture wall observation microscope (for φ20mm to φ120mm) PH200BA-D30 is the best option.


<If you want to magnify the scratches>


5. Method for inspecting using a high-magnification lens with a 90° side-view mirror attached to the tip (Requires lens rotation) is the best option.


<If you want to ensure absolute visibility of the inner wall direction at 90° without missing anything>


3. Method for inspecting using a 90° side-view (interchangeable tip) swivel borescope (φ8mm) (Requires bore rotation)

① (Interchangeable tip) Swivel borescope φ8mm 90°

② Flat dome-type lighting DC-30D-127W-CH1

③ Borescope lighting LED-3WDB is the best option.


<If you want to observe the bottom and inner walls with one device>


1. Method for inspecting the entire circumference of the inner wall in one shot using a wide-angle borescope is the best option.


<If price is a priority>


6. [Special Edition] Method for inspecting the entire circumference of the inner wall in one shot using an S-mount camera and fisheye lens is the best option.

Closest distance of endoscope and borescope

The closest distance to the object within the in-focus range (observation distance) is called the closest distance.


The closest distance has characteristics depending on the type of endoscope.


1. Endoscope equipped with advanced camera

Since there is a camera at the tip, the optical closest distance is longer.


In the case of our endoscope, the closest distance is 10 mm.
The recommended viewing distance is 10-60mm.


先端カメラ搭載内視鏡


Although it is made by another company, some low-priced models seem to have a closest distance of about 40mm.


先端カメラ搭載内視鏡


2. Borescope


Borescopes and fiberscopes have relatively short closest distances.

This is not a guaranteed value as there are individual variations, but when connecting a camera with our borescope, the closest distance is approximately 5 mm.


ボアスコープの最至近距離01  

Lens focus tonality can be adjusted, but there are limits.

The limit is around 5mm.

     
ボアスコープの最至近距離02   When we checked with our current product, the closest distance was 4.5mm.


◆How to shorten the closest distance


By inserting a close-up ring (5mm), the closest distance can be reduced to about 3mm.


接写リング


ボアスコープの最至近距離05  

When using our current product with a close-up ring (5mm), the closest distance was 2.5mm.


The “borescope camera” used this time is available at our company.

Additionally, our Borescope Camera Adapter Lens is equipped with a 5mm close-up ring as standard.

For details, please see the product page below.


How to cool a heat-resistant borescope

For heat-resistant borescopes that exceed 150℃, we cover them with a heat-resistant jacket (custom-made product).


耐熱ボアスコープ


耐熱ボアスコープ


耐熱ボアスコープ


Insert water for cooling and air for tip purge into the heat-resistant jacket.

In other words, a chiller device (low-temperature circulation high-temperature water tank) that circulates cooling water is required.

Set the water cooling outlet of the heat-resistant jacket so that the temperature is approximately 60℃ or less.

We can also propose a chiller device (low-temperature circulation high-temperature water tank) that circulates cooling water.

We will have a detailed meeting with the customer, but the following information is required at a minimum.

① Distance from chiller device → water cooling inlet

②Water cooling outlet → Distance to chiller device

③Height difference between chiller device and borescope mounting position

④ Size of heat-resistant jacket, etc.


Heat-resistant borescope

Heat resistant borescope

A bore is installed in the observation section (high temperature section), and a camera is connected to the end of the bore for observation.


高温部


When observing images under high temperature using a heat-resistant borescope,
The following two methods are the main methods.


Without cooling device

Our borescope also has a heat-resistant type (compatible with 120℃).


耐熱ボアスコープ 120℃対応ボアスコープ(φ4.0mm)
製品詳細はこちらから


●Heat-resistant borescope that can handle up to 120℃
●Enables non-destructive visual inspection of the inside of narrow parts that cannot be directly reached by the human eye.
●Compatible with various types of lighting such as M10 P=1.0 and M10 P=0.5
●Viewing direction: 0° (direct view), 30° (side view), 70° (side view)

耐熱ボアスコープ 120℃対応ボアスコープ(φ2.7mm)
製品詳細はこちらから


The compatible temperature is 120℃, but it is usually in stock and low price.


If it is a made-to-order product, we have borescopes that can handle up to 150℃.

 
受注生産

Please refer to the website for details.


With cooling device

If a cooling device is attached to the borescope, it can handle temperatures up to quite high temperatures.
It can also handle extremely high temperatures exceeding 2000℃.
This can be achieved by covering our borescope with a diameter of 4 mm or more (see our website for details) with a heat-resistant jacket (custom-made).


耐熱ボアスコープ
耐熱ボアスコープ


Insert water for cooling and air for tip purge into the heat-resistant jacket.


耐熱ボアスコープ


Most of the super heat-resistant borescopes are made to order.
Production begins after detailed discussions with the customer.
The price will be several million yen.


For details on borescopes
Please feel free to contact Shodensha technical staff 
We will make individual proposals tailored to each company.


Heat-resistant Borescope


In the observation section (high-temperature area), a bore is installed, and a camera is connected to the end of the bore for observation.


高温部


When observing images under high temperature using a heat-resistant borescope,
The following two methods are the main methods.


Without cooling device


Our borescope also has a heat-resistant type (compatible with 120℃).


耐熱ボアスコープ 120℃ compatible borescope (φ4.0mm)
Click here for product details


●Heat-resistant borescope that can handle up to 120℃
●Enables non-destructive visual inspection of the inside of narrow parts that cannot be directly reached by the human eye.
●Compatible with various types of lighting such as M10 P=1.0 and M10 P=0.5
●Viewing direction: 0° (direct view), 30° (side view), 70° (side view)

耐熱ボアスコープ 120℃ compatible borescope (φ2.7mm)
Click here for product details


The compatible temperature is 120℃, but it is usually in stock and low price.


If it is a made-to-order product, we have borescopes that can handle up to 150℃.

 
受注生産
 

Please refer to the website for details.


With cooling device


By attaching a cooling device to the borescope, it can withstand significantly high temperatures. It can even handle ultra-high temperatures exceeding 2000°C. This can be achieved by covering our borescopes with a heat-resistant jacket (custom-made) for borescopes with a diameter of φ4mm or larger (please refer to our website for details).


耐熱ボアスコープ
耐熱ボアスコープ


Insert water for cooling and air for tip purge into the heat-resistant jacket.


耐熱ボアスコープ


The ultra-heat-resistant borescopes are mostly made to order. After detailed discussions with the customer, production will commence. However, please note that the price for these custom-made products can reach several million yen.

For further details regarding the borescopes, please feel free to contact our technical staff at shodensha. We are more than happy to discuss your requirements and provide individual proposals tailored to your company’s needs.


Features of the φ1.8mm Borescope:

About φ1.8mm Borescope
Inspection of workpiece interiors and holes that couldn’t be directly observed before can now be conducted through non-destructive inspection using an ultra-thin borescope with a tip diameter of 1.8mm. With an effective length of 95mm, it offers excellent maneuverability, making it easy to inspect small parts and molds. Due to the proximity of the target object to the eyes during inspection, it helps reduce physical and eye strain.
When it comes to ultra-thin scopes, one might think of a narrow field of view, but our model features a wide 80° field of view despite its slim design. Additionally, the lenses provide extremely sharp images, allowing for comfortable observation without discomfort.
Of course, by using a camera adapter, you can connect it to a C-mount camera and view the images.
 

You can view it in our showroom.


Due to its ultra-thin design, it is highly fragile, so we do not lend out demonstration units. We apologize to those who wanted to try it out, but we would be grateful if you could consider visiting our showrooms in Osaka or Tokyo.

What is a fiberscope? Features and differences from borescopes

When observing narrow spaces that cannot be directly visualized by the human eye, we use an ‘endoscope.’

Among them, the most well-known is the ‘fiberscope,’ but endoscopes come in various types, not limited to fiberscopes.

In this article, we will introduce the features of fiberscopes and other types of endoscopes to help you choose the right one for your needs.


1. Fiberscopes and Endoscopes

Many people might think that “Fiberscope = Endoscope.”

Fiberscopes are indeed one type of endoscope.

Back when camera miniaturization was not feasible, fiberscopes dominated the field of endoscopy. Consequently, they became synonymous with endoscopes.

Currently, fiberscopes are widely used for observations with diameters below φ1mm. Due to their relatively high cost, for diameters above φ1mm, people often opt for other types of endoscopes.


2. Characteristics of Fiberscopes

(1) Đường kính siêu mỏng cho phép quan sát các lỗ nhỏ hơn φ1 mm

The primary feature is, indeed, its thinness.

Since each fiber has a camera attached to its tip, there are various options for outer diameters.

The thinnest diameter possible is around φ0.35mm, and fiberscopes with diameters above φ1mm are also available for purchase.


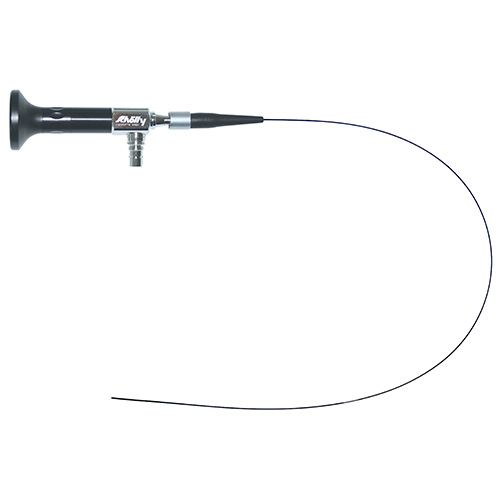
(2) Structure of Fiberscopes

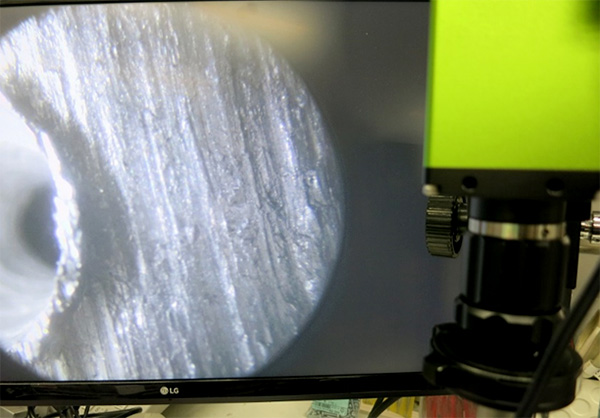
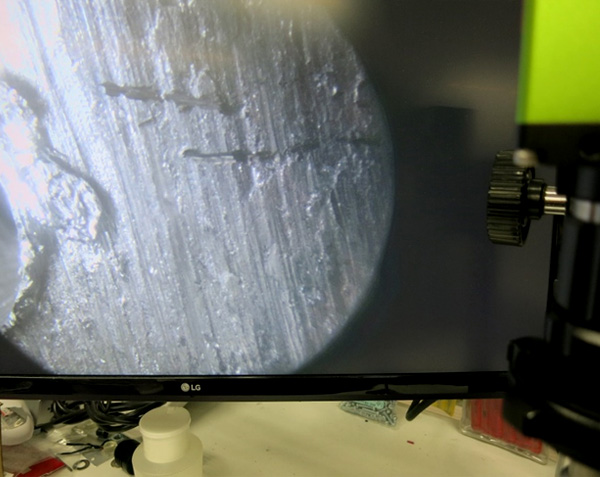
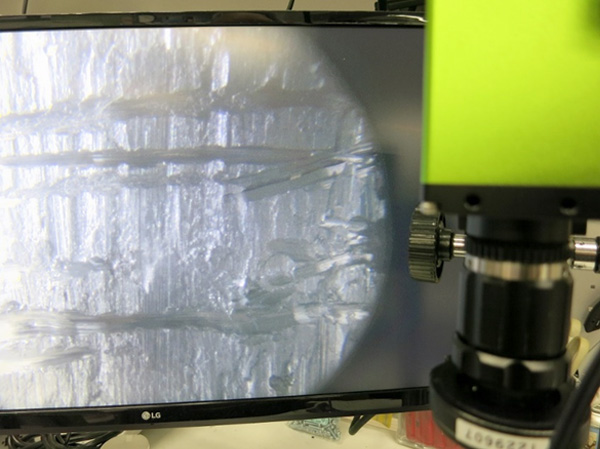
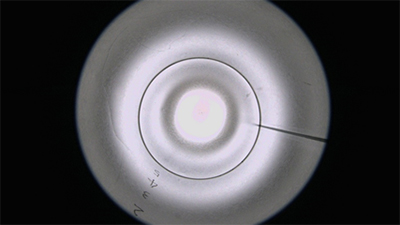
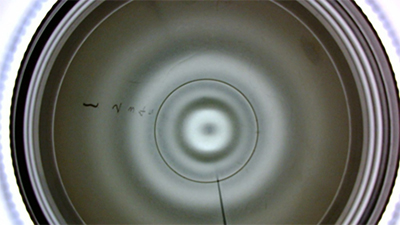
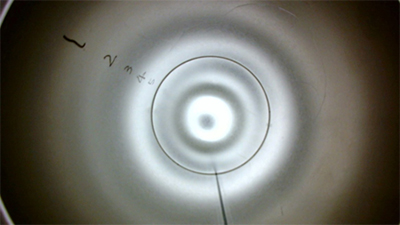
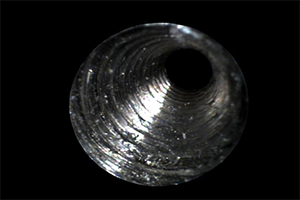
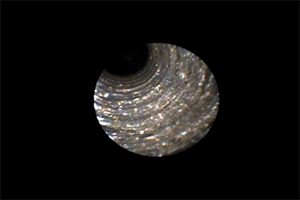
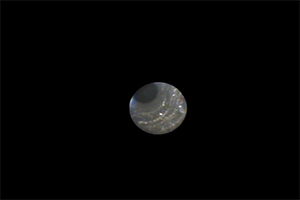
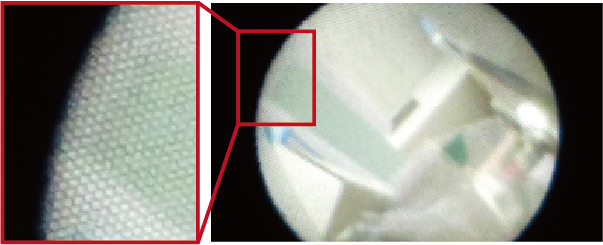
Fiberscopes consist of extremely thin fibers bundled together, with small lenses attached to the tip for internal observation.

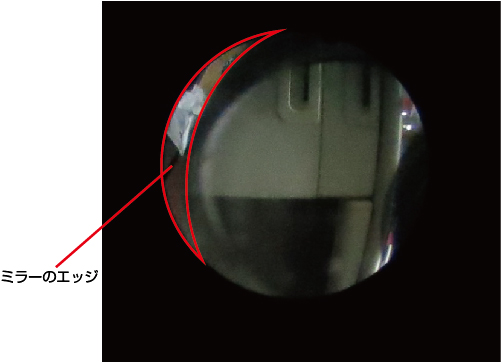
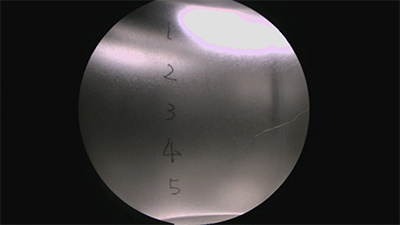
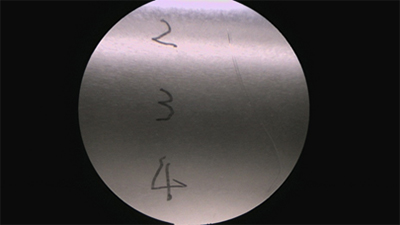
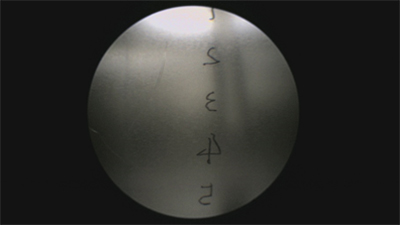
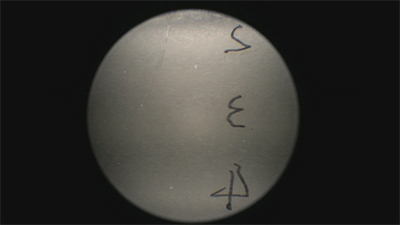
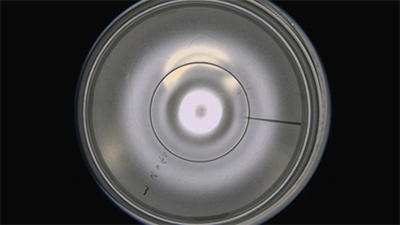
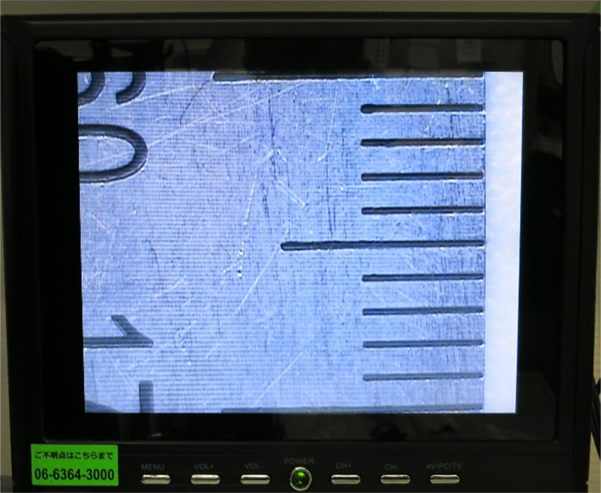
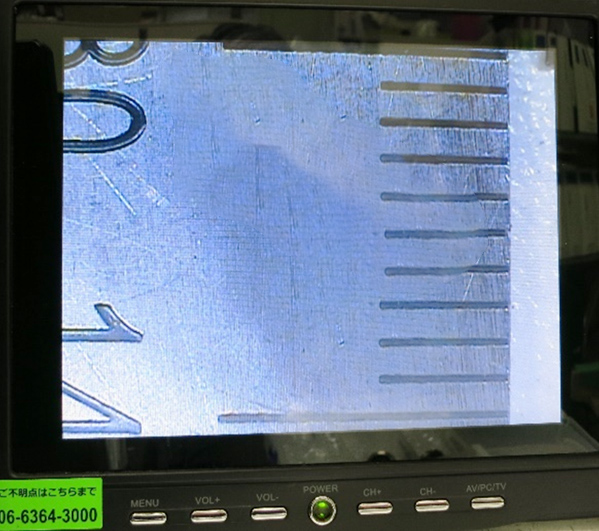
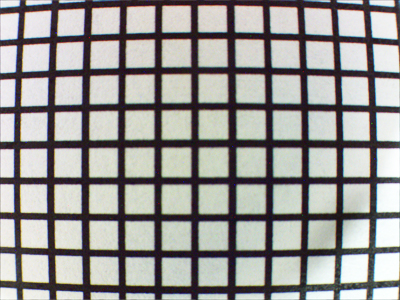
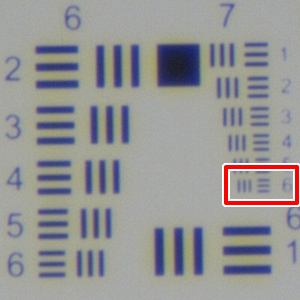
However, due to the structure of bundling thin fibers, shadows of the honeycomb structure may be visible. (It’s possible to eliminate these shadows by capturing the observation image with a camera and applying image processing, but in doing so, the image may become slightly blurred.)


ファイバースコープのデメリット


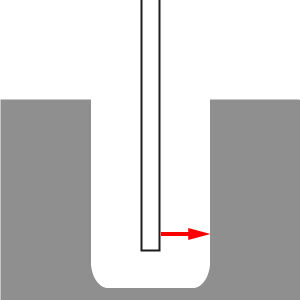
(3) Can be used in narrow, winding spaces

Since fibers are used, they can be inserted into the interior of winding pipes or into tight spaces within intricate machinery.

– Caution is required when handling!

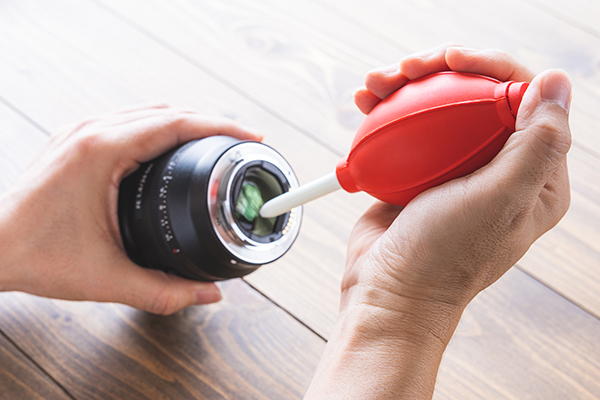
The fibers are made of highly transparent materials such as quartz glass or plastic, so applying strong force to the fiber part or reducing the bending radius too much can cause the fibers to break.


(4) Not suitable for long lengths

By adjusting the length of the fibers, it’s possible to observe inside long pipes. However, since light (image) passes through the fibers, extending the length will proportionally darken the image. (This is due to losses from reflection within the fibers.) Additionally, because fibers themselves are expensive, the price increases proportionally with length.


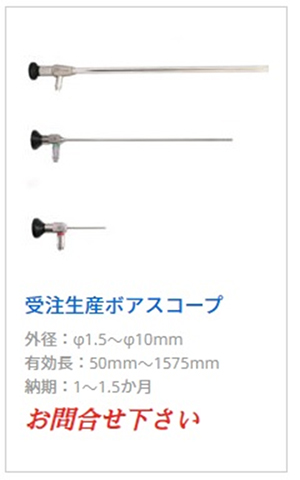
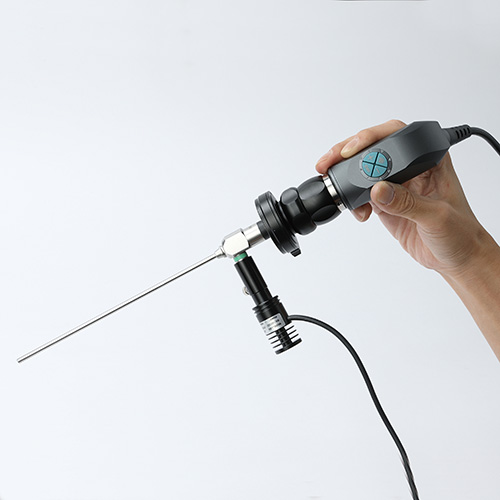
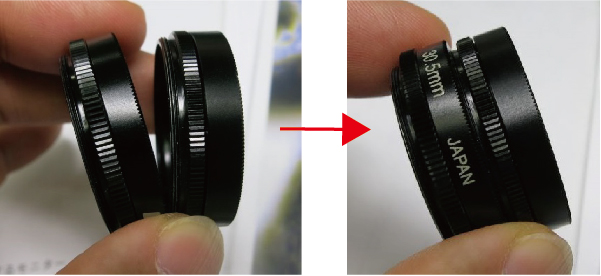
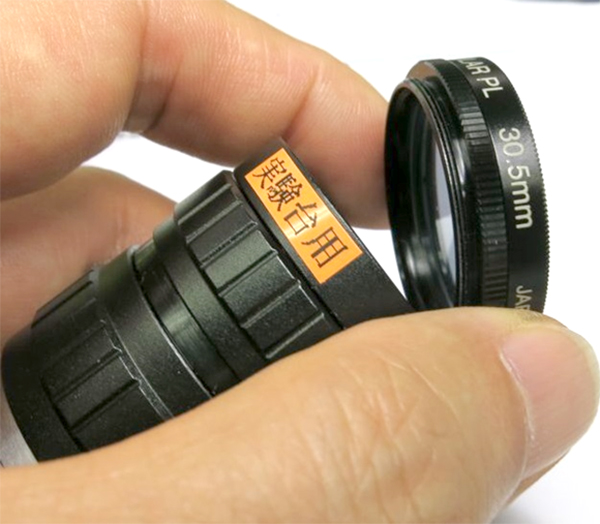
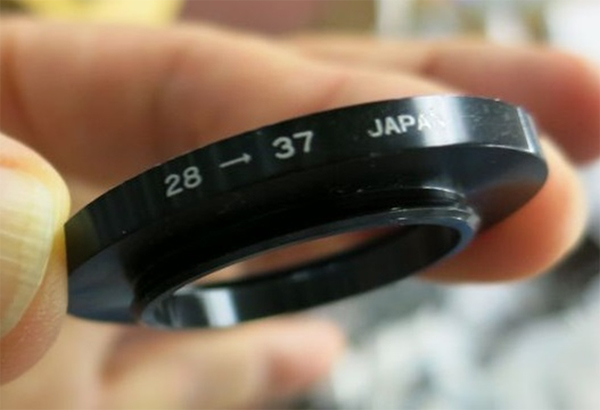
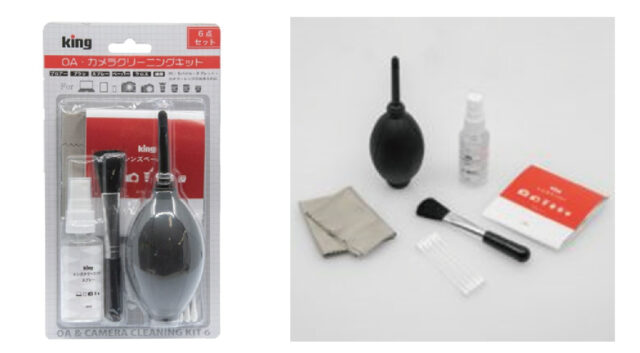
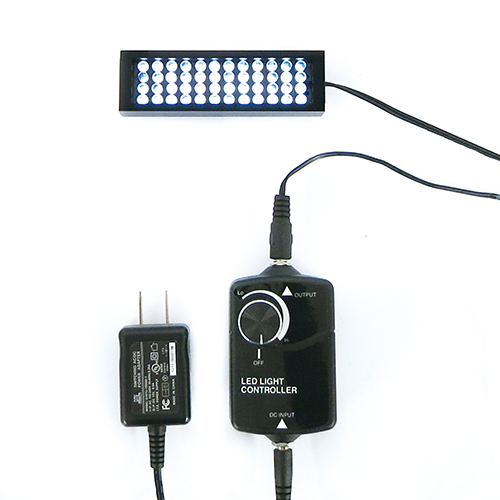
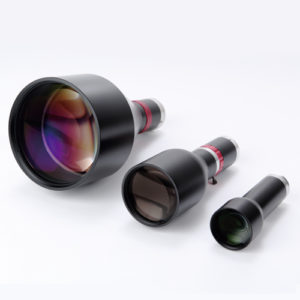
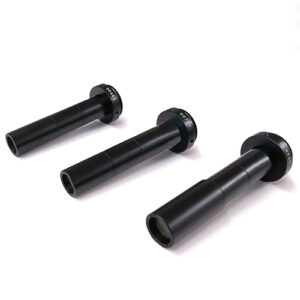
◆ Capable of Observing Below φ1mm! Recommended Fiberscopes


超細径ファイバースコープ MO.080500.0070  

超細径ファイバースコープ

MO.080500.0070


476,000円(税抜)


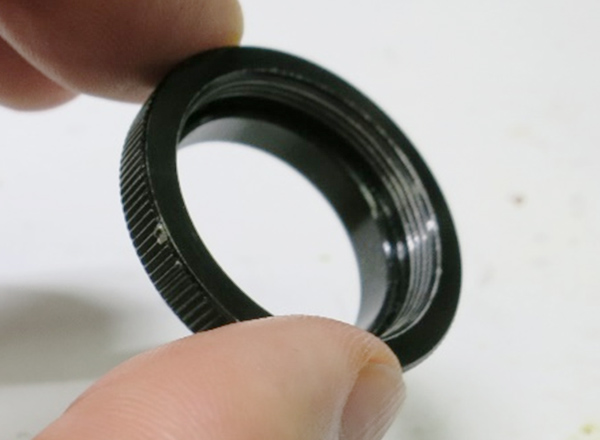
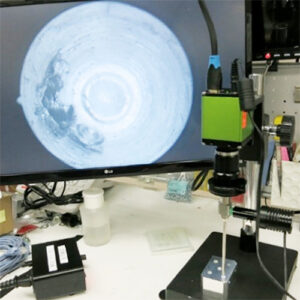
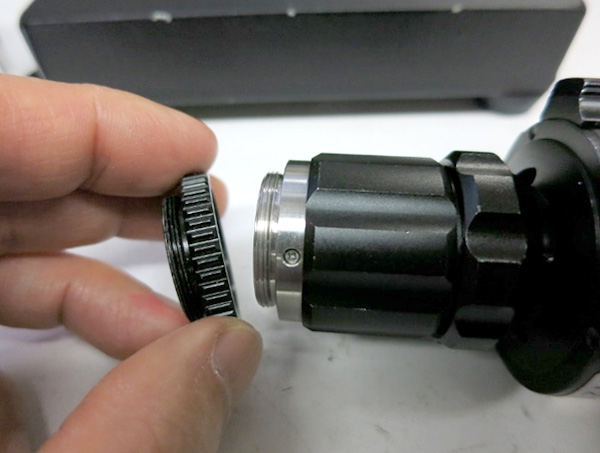
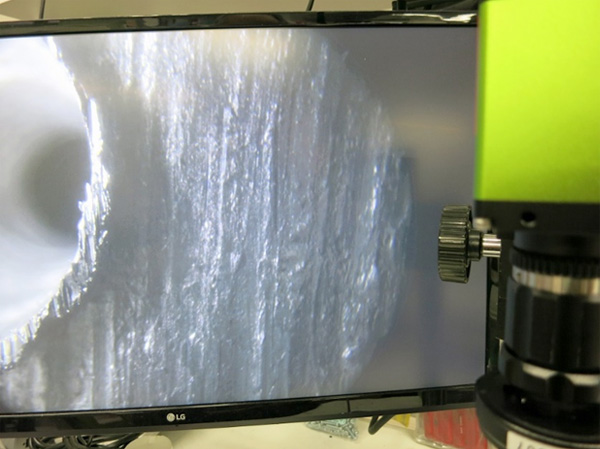
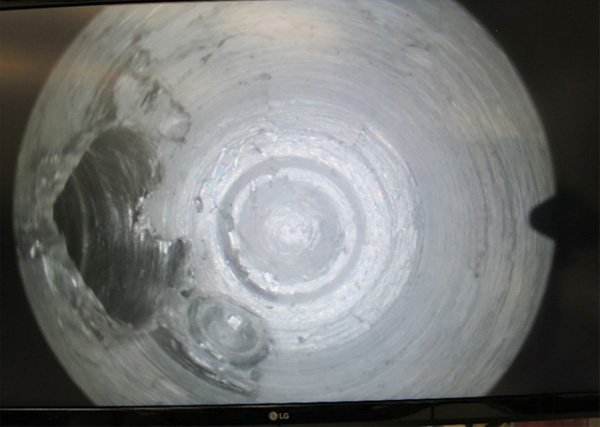
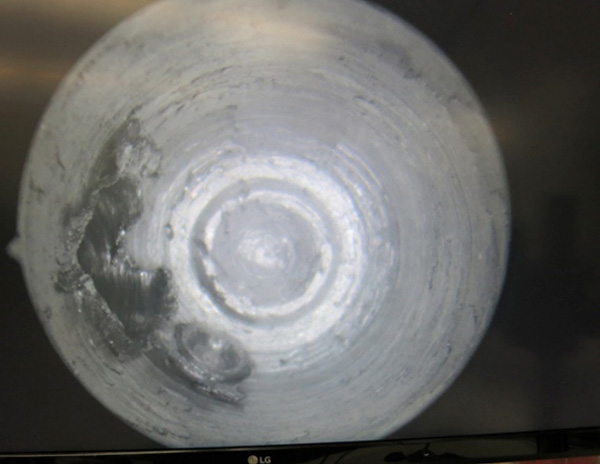
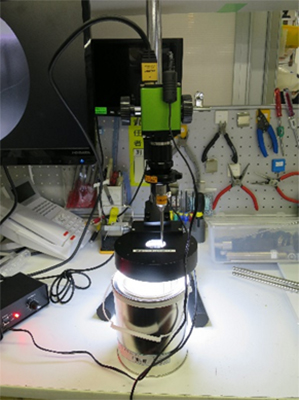
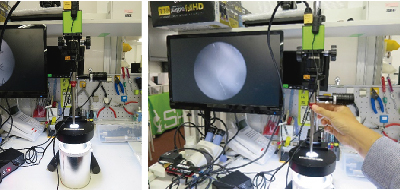
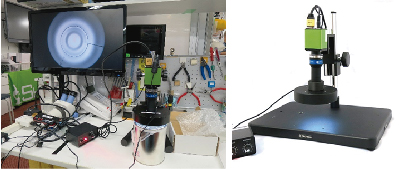
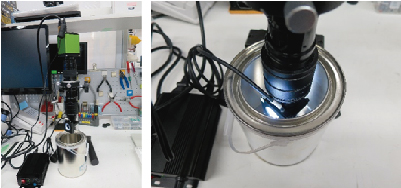
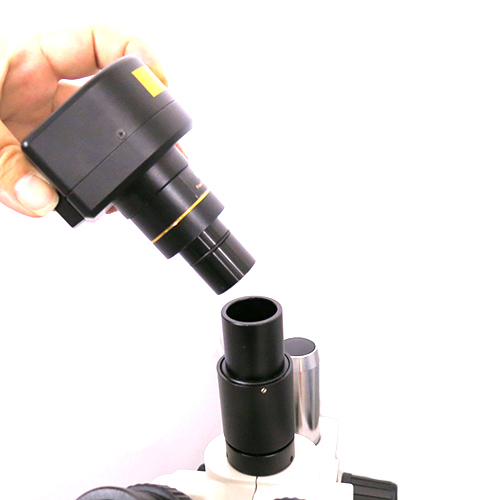
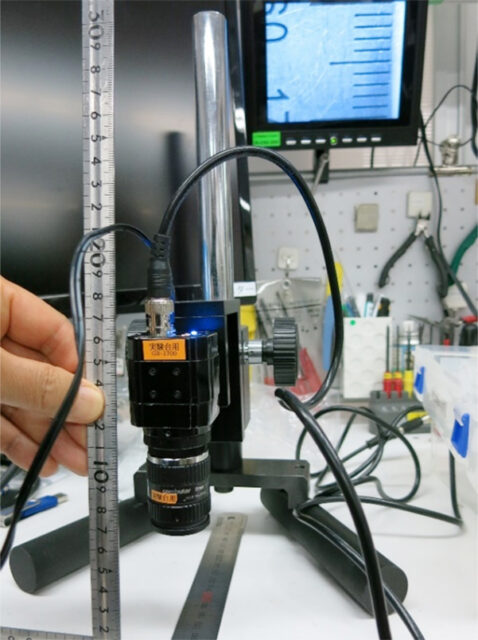
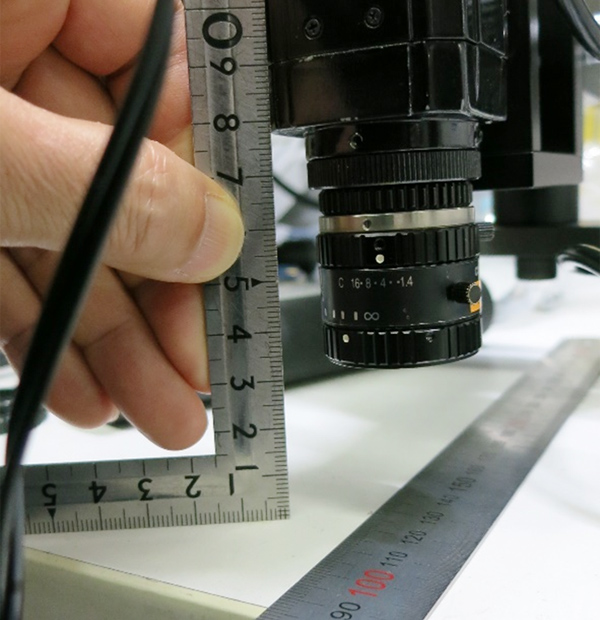
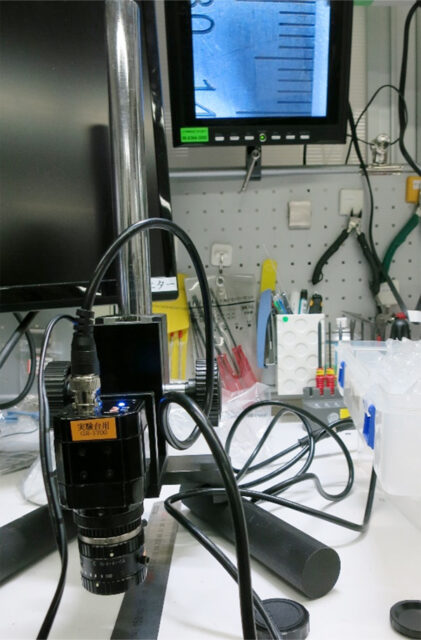
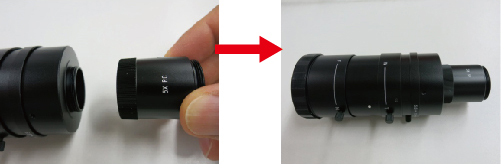
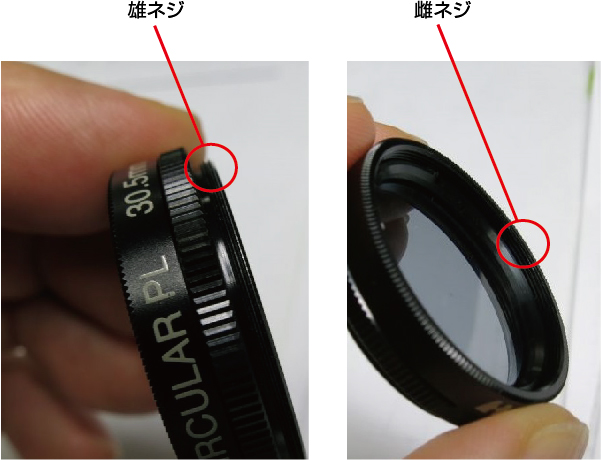
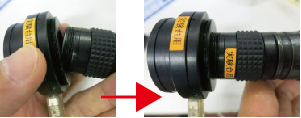
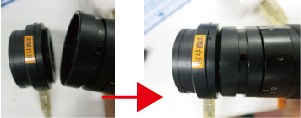
By using an adapter lens, it’s possible to connect to a camera and observe on a PC or monitor.


3. Other Types of Endoscopes


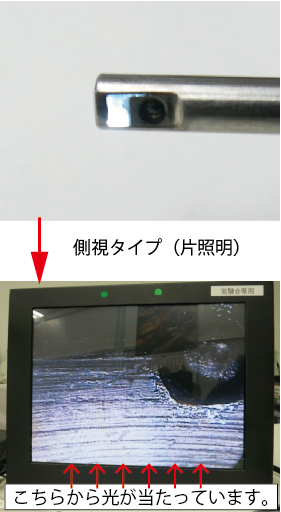
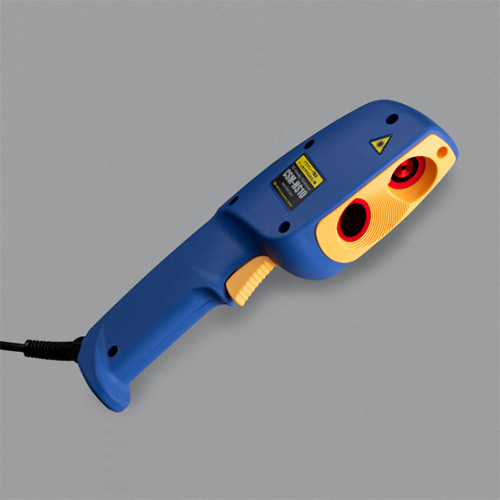
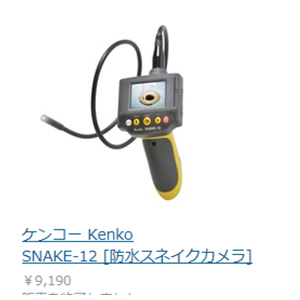
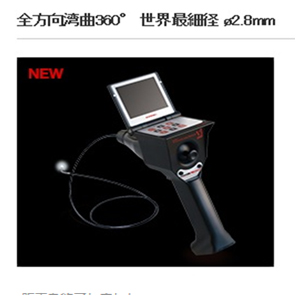
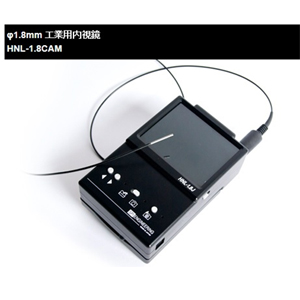
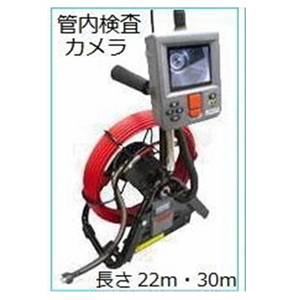
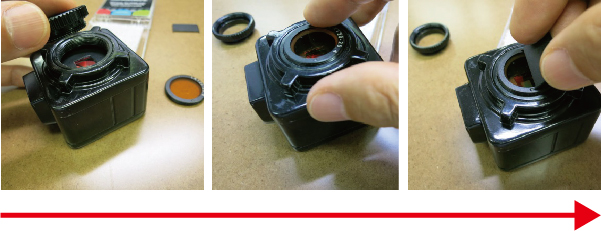
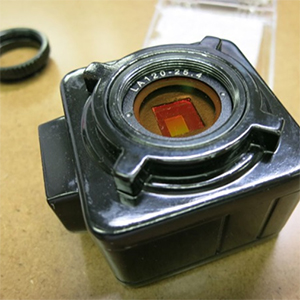
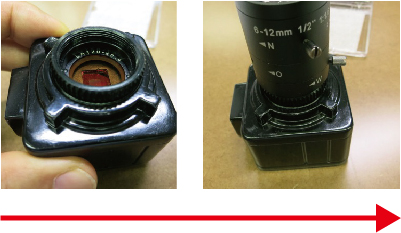
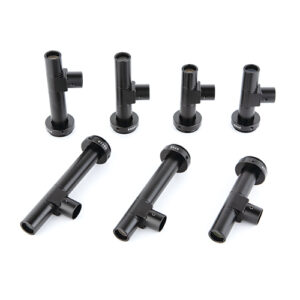
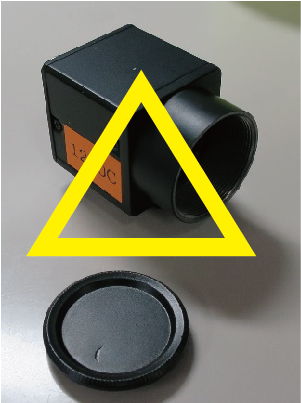
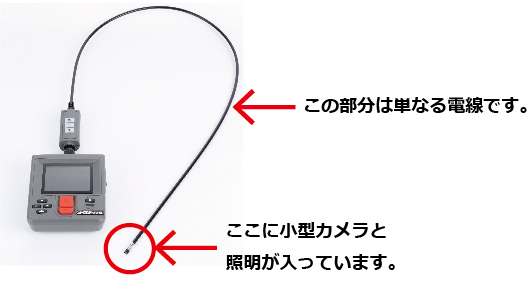
(1) Endoscopes with Built-in Front Camera

Currently, there are many types of endoscopes available for sale, widely used in various fields. These endoscopes feature a small camera and lighting enclosed at the tip.

Our MIGS series corresponds to this type of endoscope.


先端カメラ内蔵内視鏡


<Advantages>

– Among endoscopes, relatively affordable due to the absence of special lenses or fibers. (*There are also high-end types with additional features.)

– The relay part consists of wires, allowing for greater flexibility than fibers. Additionally, long-length types are available.

– As it’s simply a camera, it can be adapted for various applications.

(*See below for details)


Kenko brand: Ultra-Low-Cost Endoscope


Endoscope with Handheld Tip Control

 
超低価格内視鏡   超低価格内視鏡
     
Endoscope Connectable to Mobile Devices   Long-length endoscope
内視鏡   内視鏡
For SPI brand camera types, the minimum diameter is φ1.8mm.   Mitcorp Brand: Waterproof Type for Pipe Inspection, 22mm Length


<Disadvantages>

– Resolution depends on the camera. (Resolution worsens as the camera size decreases.)

– Due to the size of the camera (sensor) and LED chips, it’s not possible to achieve the same thinness as fiberscopes or borescopes. (Minimum around φ1.8mm)

– Focus depends on the camera’s focal length, so it may not focus properly on close-up parts. (Minimum focusing distance: approximately 10mm to 15mm)


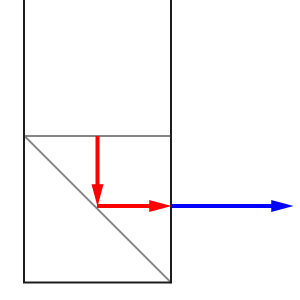
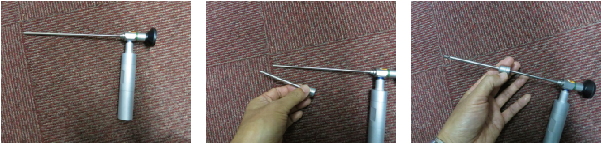
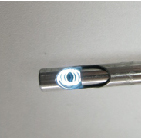
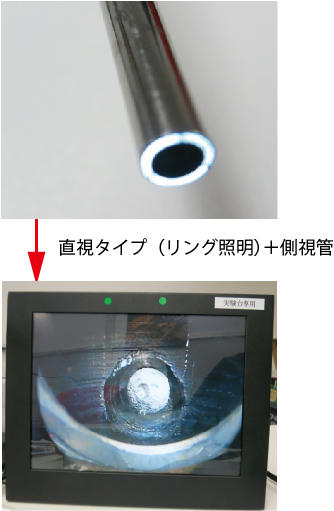
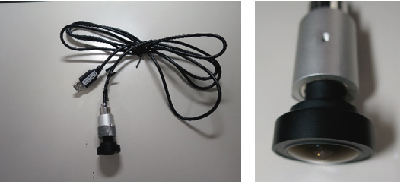
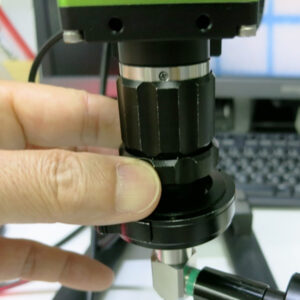
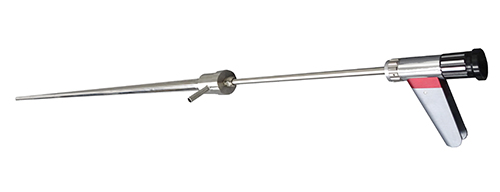
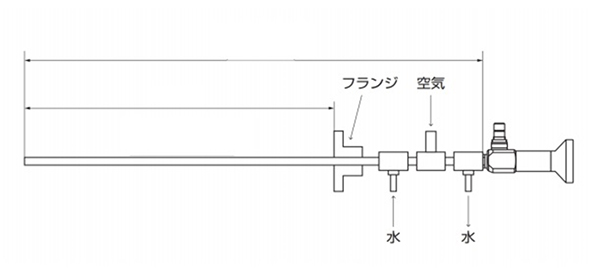
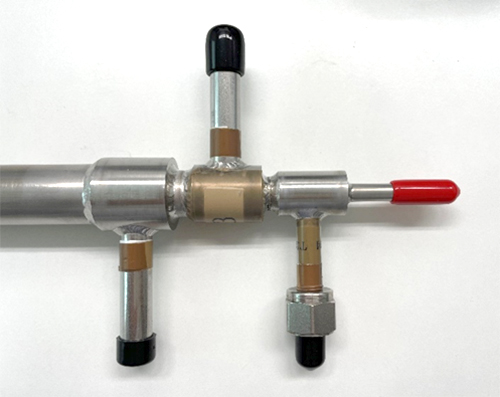
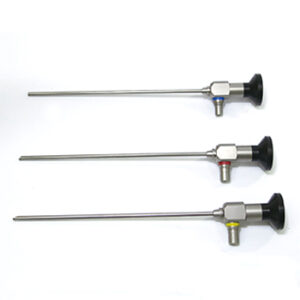
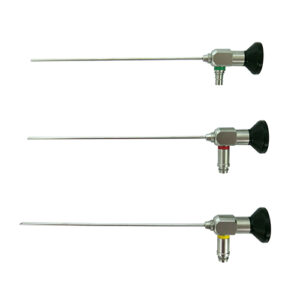
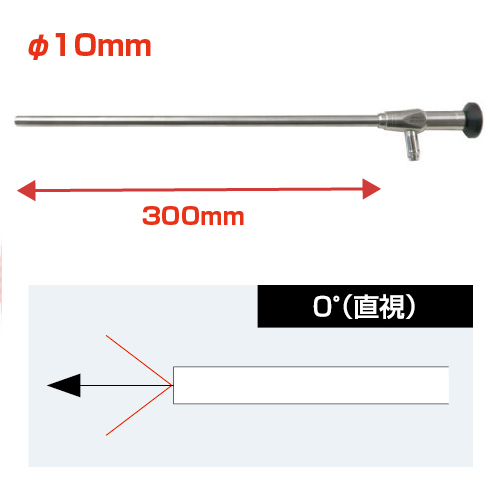
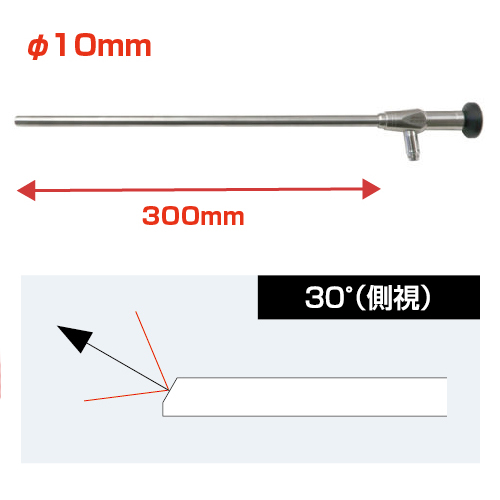
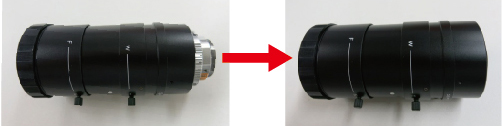
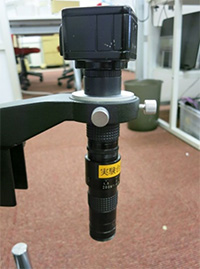
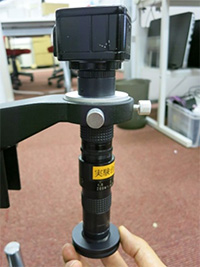
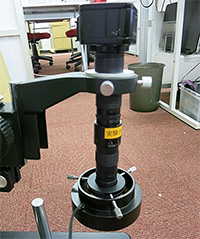
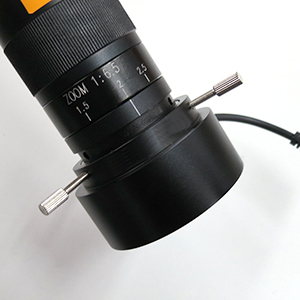
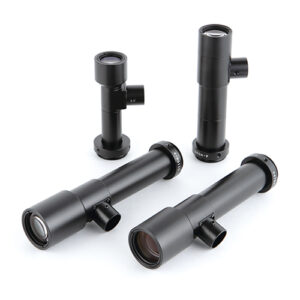
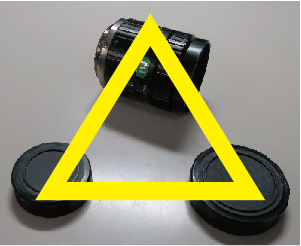
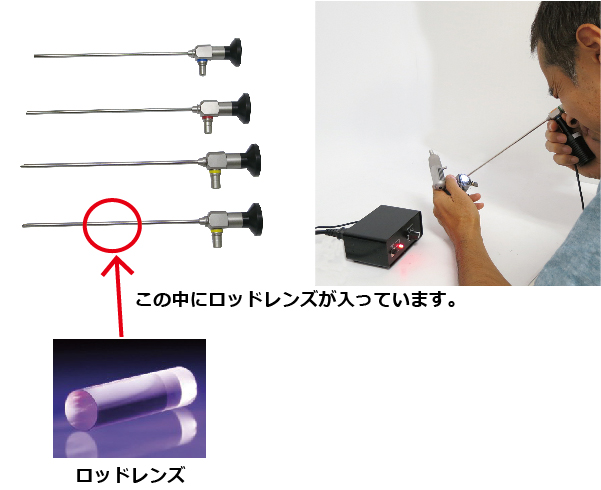
2) Borescopes (Rigid Endoscopes)

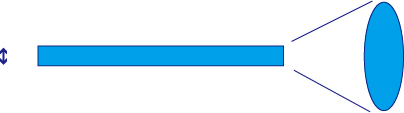
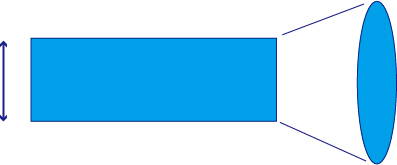
A borescope consists of multiple rod lenses enclosed in the tip of a stainless steel tube, designed to focus at the eyepiece (end).

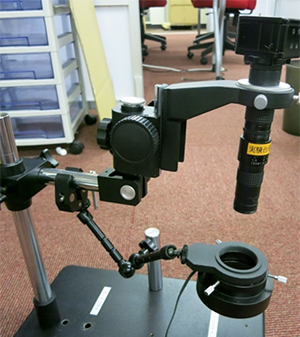
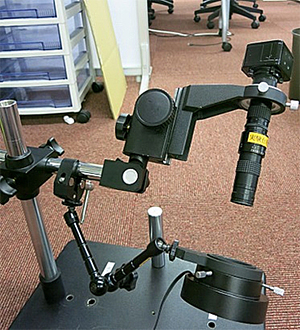
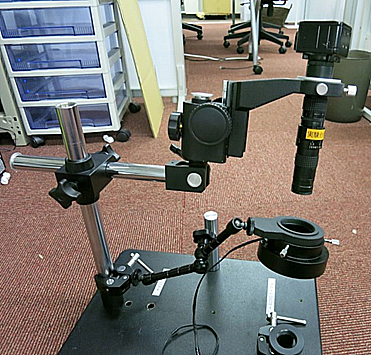
Most borescopes have a basic shape similar to the following:

⇒ You can find Shodenshadensha’s borescope series here.


松電舎のボアスコープ


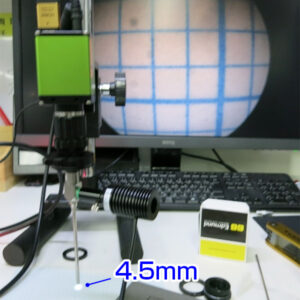
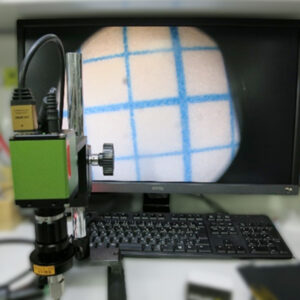
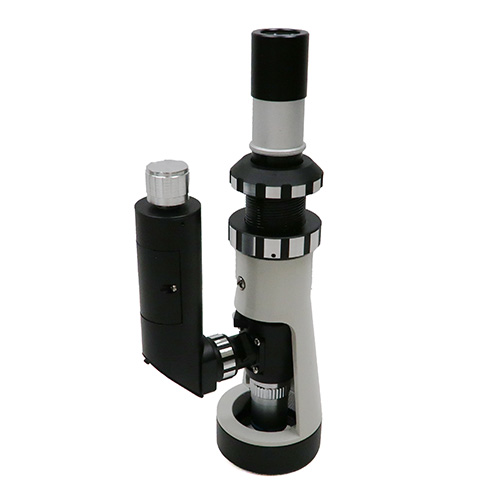
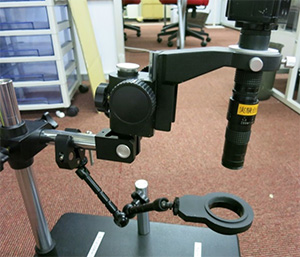
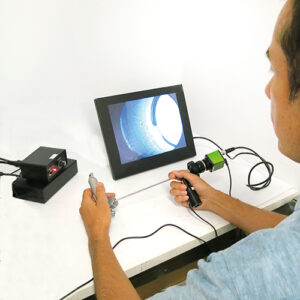
– It’s also possible to observe on a PC or monitor!


While the premise is for direct viewing, connecting a camera using an adapter lens allows for observation on a PC or monitor.

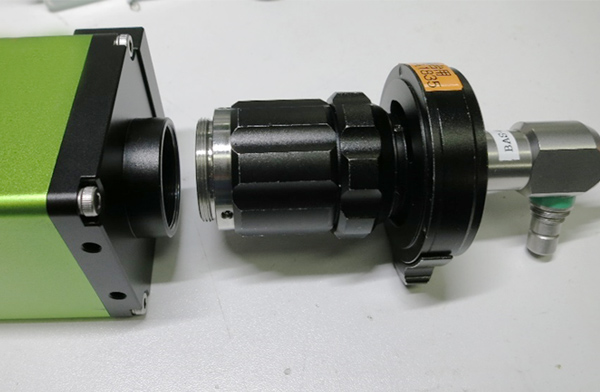
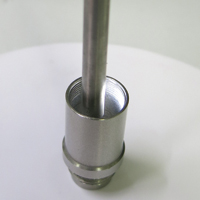
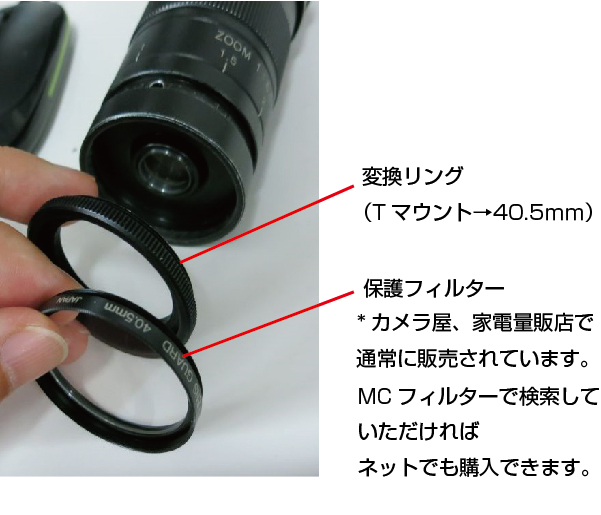
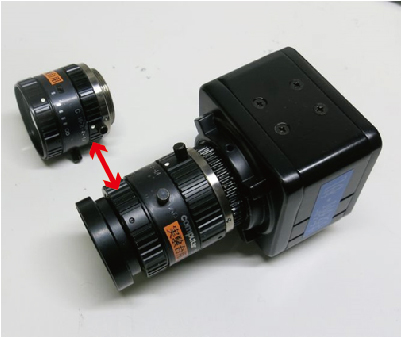
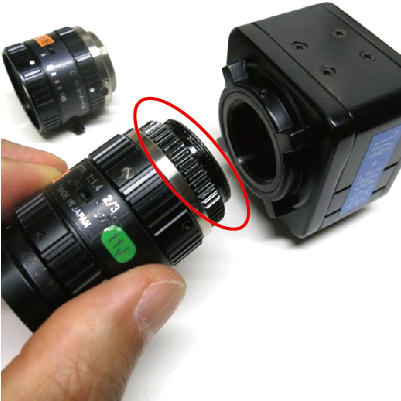
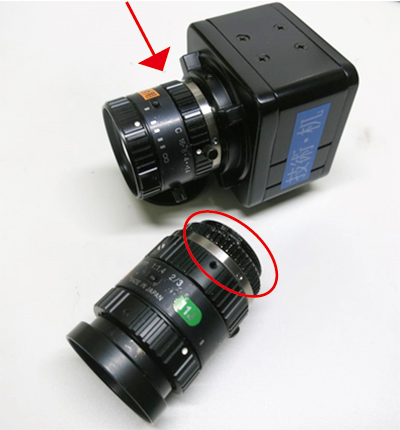
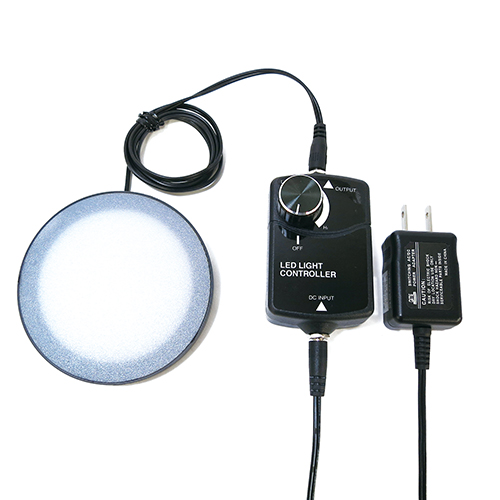
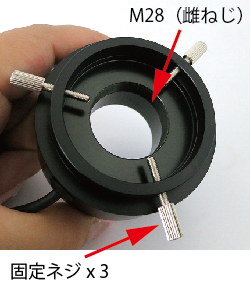
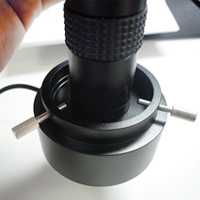
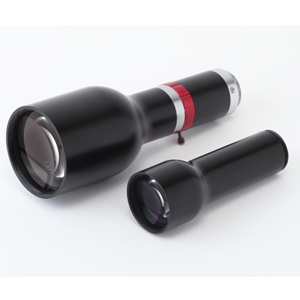
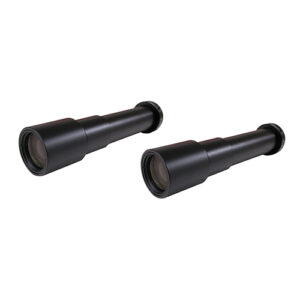
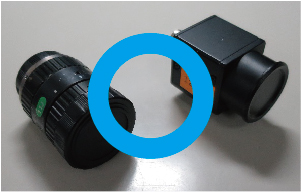
◆ Borescope, Adapter Lens, Camera Integrated as One!

Recommended Borescope Camera System


ボアスコープ専用 ハンディカメラシステム BHO200LT  

ボアスコープ専用

ハンディカメラシステム

BHO200LT


398,000円(税抜)


We also offer sets like “High Definition Camera + Camera Adapter + LED Light Source” as well as standalone options such as “Adapter Lenses” and “Borescope Dedicated Cameras”.


松電舎のボアスコープ松電舎のボアスコープ


You can find Matsudensha’s borescope camera systems and options here: [link]


<Advantages>


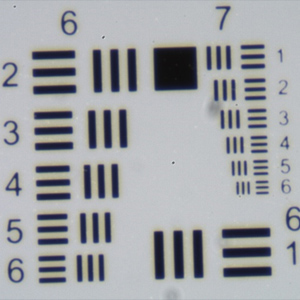
– Image is sharper than with fiberscopes.

– It can observe objects at close proximity. (With a bit of adjustment, focusing can be achieved at around 3mm.)

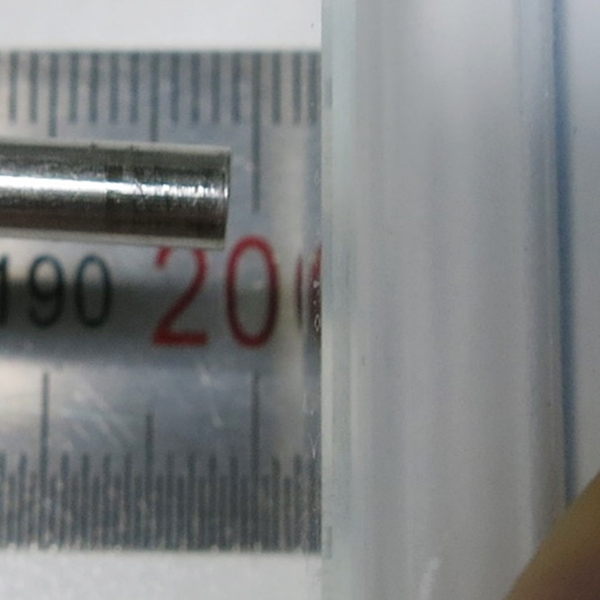
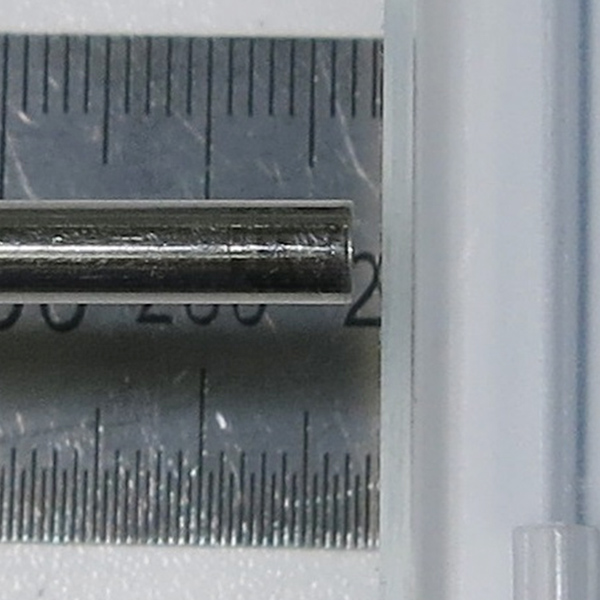
– While not as thin as fiberscopes, it’s still capable of narrow diameters. (Our borescopes offer minimum diameters of around φ0.7mm.)

– Since there are no electronic devices such as cameras in the borescope part, it can be tailored for waterproofing, heat resistance, saltwater resistance, chemical resistance, etc. (Our products include standard heat-resistant types up to 120°C.)


<Disadvantages>


– Cannot be custom-made to any length due to the need to focus with multiple lenses.

– Cannot be bent due to the structure of glass lenses in stainless steel tubes.

– Glass lenses lack resilience against impacts or bending stress. (While not as resilient as larger diameters, they are durable with careful handling.)

– Generally, it’s more expensive than standard endoscopes with built-in cameras. (If used for direct viewing without connecting a camera, the price decreases.)


Summary 

Many people might think that “Fiberscope = Endoscope,” but in fact, a fiberscope is just one type of endoscope.

There are various types of endoscopes, including:

– Fiberscopes
– Endoscopes with built-in front cameras
– Borescopes (rigid endoscopes)

Each has its own advantages and disadvantages, allowing you to choose the one that best suits your needs.

At Matsudensha, we offer a wide range of products, including the endoscopes mentioned here. For more details, please visit our product page below.

If you have any difficulty choosing an endoscope, please feel free to contact us via the inquiry button at the bottom of the page.

The characteristics of a borescope (rigid endoscope).

■ Regarding Field of View
The field of view is determined by the angle of view listed in the catalog. However, even with the same field of view, it becomes narrower as the diameter becomes smaller.

<Example>
When comparing φ0.7 and φ2.7, the field of view angle is almost the same.
(φ0.7 has 70°, and φ2.7 has 75°.)


これをφ0.7とすると ボアスコープ(硬視鏡)
   
φ2.7 would have this thickness. ボアスコープ(硬視鏡)


■ Regarding Resolution
For borescopes (rigid endoscopes), there are both rod lens type and fiber type. In our case, those with a diameter of φ2.7mm or larger are rod lens type, while those thinner are fiber type. Fiber type has lower resolution compared to rod lens type. When comparing fiber types with each other, resolution decreases as the diameter becomes smaller.


<Example> Observing an M4 screw hole.


φ2.7mm, rod lens type.

ボアスコープ(硬視鏡)


φ1.6mm, fiber type.
Due to the structure of bundling fibers, lines of the honeycomb structure of the fibers occur. In our case, we slightly reduce the contrast to eliminate those lines.

φ1.6mm ファイバー


φ0.7mm, fiber type.

φ0.7mm ファイバー


Even if you feel that the image is coarse with an endoscope type that has a camera built into the cable tip, using a borescope with a high-sensitivity, wide dynamic range video camera (as an example system) will improve clarity. Furthermore, depending on the camera’s functionality, you can reduce overexposure and shadows. (Resolution remains unchanged, but with a larger sensor size, brightness and clarity increase.)

We introduce borescope systems on shodensha’s product website. Please take a look. You can find it here


HIGH ADVANCED HIGH DEFINITION CAMERA DESIGNED FOR MICROSCOPY  HDCT-20XM

Experience unparalleled visual clarity with our Full HD camera designed specifically for microscopy

Capable of capturing and storing observation images with remarkable precision

Optimized for inspections!

● Ideal for inspections with no display delay!

● Capable of saving images: The camera body features video and still image recording and playback functions.

Halation correction enabled!

● Wide dynamic range support allows for observation with images free from black crush and white blowout.


By utilizing the optional 1.8m wired remote control (¥4,000 excl. tax), you can save still images or videos, adjust images, and more without touching the back of the camera.

Affordable translucent illumination RD-95T

Transmitted illumination with surface emission Attaches to a compact stand with a diameter of φ95mm

● Surface emission transmitted illumination
● φ95mm
● Can be attached to our company’s small stand for microscopes with coarse and fine adjustment angles, as well as a fan-shaped base for microscopes. It can also be mounted on stands of similar size from other manufacturers
● Equipped with rubber feet on the bottom, allowing for standalone use

PORTABLE METALLURGICAL MICROSCOPE PMM-100

Suitable for various work sites and factories! Compact metallurgical microscope

Stored in a supplementary aluminum case for compact storage and portability

● Compact and lightweight! Allows observation of hard-to-move objects

● Convenient for carrying to on-site locations with a dedicated case

● Securely fixable to the object with a magnet XY stand

● Battery-operated adjustable LED coaxial illumination

● Polarization observation also possible with included polarizing filter

Selection of Industrial Lenses


Industrial cameras typically do not come with lenses included. Therefore, once you’ve chosen your camera, you’ll need to select a lens. However, choosing a lens requires some knowledge. Even when looking at the specifications of lenses, it’s often difficult to determine which one is best.

The most crucial parameter in selecting a lens is the area you want to capture with the camera and the distance to the subject. For example, if you want to capture a 30cm by 30cm area and the camera will be positioned 1 meter away, having such preferences can simplify the lens selection process.

If you have preferences like the example above, consulting our lens selection experts will allow us to recommend the best lens for your needs. However, if you prefer to choose a lens yourself, you can do so using the following methods.


①If you want to calculate and choose a lens yourself


If you want to calculate and choose a lens yourself:

For fixed-focus lenses, you can calculate the area based on the lens’s f-value. Consider your desired area in the aspect ratio of the camera sensor. If the camera sensor has a 4:3 aspect ratio, then the field of view will also be in a 4:3 ratio.

For example, if you want to capture a 30cm by 40cm area:
40cm (horizontal) × 30cm (vertical) field of view.

The formula for calculating the f-value is:

f-value = (Distance to the object (mm) × Camera sensor size (horizontal or vertical in mm)) / Desired area (horizontal or vertical in mm)

You can use either the horizontal or vertical values for calculation. If you choose to use the vertical sensor size in the calculation, adjust the area to match the vertical dimension as well.

Calculating in the vertical direction:

f-value = (1000 × 4.8) / 300

This results in an f-value of 16mm.

If the calculated result is not available in the lens lineup (e.g., f-value = 20), choose the closest available lens. For example, if the closest options are 16mm and 25mm, selecting the 16mm lens will provide a wider field of view than your desired area, while the 25mm lens will provide a narrower field of view.

For more detailed information, please refer to the following link.


カメラのイメージサイズ


② If you want to choose a lens yourself without performing calculations:

 
Actually, we have a convenient calculator on our company’s website that automatically calculates it for you by just entering the conditions. Simply select your camera and input the distance, and the optimal lens will be calculated for you. You can find the calculator at the following link


CCTVレンズ計算機


By leveraging ① and ②, you can select the lens you desire at any time.

Of course, you can always feel free to consult with our lens selection experts if you prefer.

When using a fixed-focus lens alone, close-up photography is not possible due to its minimum focusing distance.

We have confirmed the conditions necessary to secure a 10mm field of view. (The camera uses a 1/3-inch sensor)


■When using an f=25mm lens


固定焦点レンズで10mm視野確保01  

“Focal length approximately 70mm

f=25mm lens + 5mm close-up ring”


The field of view is approximately 10mm in the vertical direction


固定焦点レンズで10mm視野確保02   固定焦点レンズで10mm視野確保03


■When using an f=16mm lens


固定焦点レンズで10mm視野確保04  

Focal length approximately 35mm

f=16mm lens + 5mm close-up ring


固定焦点レンズで10mm視野確保05   固定焦点レンズで10mm視野確保06


The ‘fixed-focus lens’ used in this observation is available from our company.

For more details, please visit the product page below

The difference in appearance due to the aperture control of the macro zoom lens

We have a macro zoom lens with aperture control available at our company.

We’ll compare the differences in appearance due to the aperture


マクロレンズの絞り比較01


The shooting range is as shown in the above photo, but for a clearer comparison, we will enlarge and compare the red-framed area (including scratches, rough surfaces, and metallic surfaces)


1.Fully open aperture

The image becomes brighter and the resolution increases, but the contrast decreases


マクロレンズの絞り比較02


2.Stop down a bit

The image achieves a balanced mix of color reproduction, contrast, and resolution.


マクロレンズの絞り比較03


3.As narrow as possible.

The depth of field becomes deeper, but the resolution decreases


マクロレンズの絞り比較04


<Reference>

If you observe the same field of view with a medium magnification macro zoom lens, it will look like the following


マクロレンズの絞り比較05


The details of the ‘macro zoom lens with aperture control’ used this time can be found on the following product page.

Cách đạt được độ phóng đại 100 lần với tiêu cự 300mm

The silver part of our company’s long-distance lens (rear converter) is removed.


It’s a long-distance lens with a magnification ranging from 4x to 40x when the focal length is 300mm.
※ Magnification is calculated based on a 1/2.5 inch camera, equivalent to a 17-inch monitor.

A 5x rear converter is attached.


However, attaching a 5x rear converter will decrease both brightness and resolution.

Our long-distance lens is equipped with a focusing adjustment function, so you can use it with focal lengths ranging from 200mm to 400mm. When attaching the 5x rear converter, if the focal length is set to 200mm, the magnification will be approximately 150x.

METALLOGRAPHIC MICROSCOPE (ULTRA-HIGH MAGNIFICATION MICROSCOPE) GR3400J

High-quality metallographic microscope available at a reasonable price!

● Ideal for observing metals
● Adoption of wide-field eyepieces ensures high-quality and wide-field observation
● Capable of polarized observation with transmitted illumination
● Compatible with versatile microscope cameras
※ Voltage is compatible with 100V, but can be modified for international use upon request.

Method for attaching a filter to a lens without threaded screws for the filter

Here’s how to attach a filter to lenses that don’t have threaded screws at the front or are of the coaxial type, where filters cannot be directly attached.


Convenient for this purpose are filters of the type shown on the left. (C-mount filters)


On the left is a color balance filter that reduces LED flicker and bluish tint.


This type of filter is attached to the camera rather than the lens.

For our cameras…


First, remove the C-mount ring “Attach the filter.”


Screw it in using the provided tool until it’s fully inserted


This is the appearance after installation
 
     
Reattach the C-mount ring and mount the lens

INVERTED-TYPE METALLOGRAPHIC MICROSCOPE (ULTRA-HIGH MAGNIFICATION MICROSCOPE) GR-29J-C3J

A full-fledged inverted-type metallographic microscope is available at a modest price!

● Optimal for the observation of metals

● Convenient for observing specimens with considerable thickness as it allows observation from below

● Utilization of wide-field eyepieces enables high-quality, wide-field observations

● Capability for polarized observations with incident illumination

● Compatible with versatile microscope cameras


※ The voltage is compatible with 100V; however, it can be adjusted for international compatibility upon request. Please inquire for further details.

※ A 100x objective lens (oil immersion lens) and immersion oil are not included with the demonstration unit. If you wish to use them, please inquire separately.

The method of attaching ring lighting to a slim lens

1. Attach a dedicated fixed ring to the tip
     
2.Utilize an easy arm for ring lighting
イージーアーム(リング照明用)
KA-R


You can move the three joints freely

     
It can be attached to a 3D arm (horizontal branch
 
     
When attached to a 3D arm, tilting the lens also tilts the LED ring light simultaneously, which is convenient  
     
“Of course, it can also be attached to a support pillar.”

The method of attaching the filter

The filters to be attached to the lens usually have ‘male and female threads of the same size’.


If it’s a 30.5mm filter, both would be labeled as M30.5mm. Therefore, you can stack multiple filters of the same size and use them together


Of course, it can also be attached to a 30.5mm lens. In the case of a universal lens, since the lens side has a female thread, you would attach the male threaded side of the filter.。


If you need to change the diameter, conversion rings like the following are available.

(The following is a ring for attaching a 37mm filter to a 28mm diameter lens.)


AFFORDABLE TRANSMISSIVE ILLUMINATION RD-95T

Surface-emitting transmissive illumination, compatible with a compact stand with a diameter of φ95mm.

● Surface-emitting transmissive illumination

● φ95mm

● It can be attached to our company’s small stands for microscopes with coarse and fine adjustment angles, as well as fan-shaped bases for microscopes. Additionally, it is compatible with stands of the same size from other companies

● Equipped with rubber feet on the bottom for standalone use

Lens and Filter Cleaning Method


I will describe the cleaning method for lenses and filters.

Lenses and filters can accumulate dust, debris, dirt, fingerprints, and other particles.

When cleaning, please follow the steps below.


**Items Needed:**


– Commercial lens blower
– Commercial lens cleaning tissues, paper, or lens cleaning cotton swabs
(Items with low or no dust generation)
– Commercial lens cleaning solution or high-purity ethanol

There are products available that combine the above items into one set.


レンズの清掃


Product by KING (Asanuma Corporation):

Camera Cleaning Kit

[Attention]

While a canned air duster can be used as a substitute for the blower, some canned air dusters may release fine water droplets. Please avoid using this type for lens and filter cleaning.


~Steps~

(1)Use the blower to blow away coarse debris from the surface of the lens or filter

[Attention]

If you wipe while dust is still adhered, it may scratch the lens surface or cause the coating to peel off. Please ensure thorough blowing to remove dust completely.


レンズ用ブロワー


(2)Wrap lens cleaning paper around a lens cleaning stick or similar tool

[Attention]

While tweezers can be used as a substitute, if the paper tears and the metal directly touches the lens, it may scratch the lens surface or cause the coating to peel off. Please avoid using metal tweezers or those with sharp tips.


レンズ清掃


(3)Drip a few drops of cleaning solution onto the wrapped cleaning paper to moisten it.


(4) Wipe the surface of the lens

“There are two methods for wiping: radiating from the center to the periphery and spiraling from the center to the periphery. Choose according to the direction of dirt.


[Attention]


Please wipe gently. Wiping vigorously may cause the coating on the lens surface to peel off.”


レンズの清掃


(5)When there are water droplet residues, dry wipe.

[Attention]

Please wipe gently during this process. Wiping too hard may cause the coating on the lens surface to peel off.

BAR LED IllUMINATION LED-BL

● The adjustable beam angle allows for versatile applications

● Effective for evenly illuminating large objects

● Dimmable via the control box

● Equipped with a tripod hole (1/4 inch UNC) on the rear

● Compatible with Easy Arm, KA-N attachment

BAR LED IllUMINATION (DOUBLE, 10CM) LED-BL10-CH2

An effective 2-light bar illumination, double type, 10cm, ideal for evenly illuminating large objects

● Capable of brightening every corner of the object

● Dimmable for both LEDs with a single control box

● Independent lighting and dimming possible for each side

● Equipped with a tripod hole (1/4 inch UNC concave) on the back.


How to attach the lens to the small diameter ring light

Introduce two types of ring lights


省スペースLED照明 細径40灯LEDリング照明
Space-saving LED lighting LED-16


40 small diameter LED ring lights
LED-40


Outer diameter φ48mm
Inner diameter φ15mm


Outer diameter φ63mm
Inner diameter φ27mm


16 lights flat
(The LED angle is 0°, pointing straight down.)


40 lights direct
(The LED has an angle)


dimmable


dimmable


<mounting method> <mounting method>
Exclusive for M28/M42
(M42 is a standard called T-mount)
The M28 female thread uses three fixed screws.
省スペースLED照明 細径40灯LEDリング照明
   
The slim lens is secured using M28.省スペースLED照明 The slim lens is secured using M28.細径40灯LEDリング照明
   
The standard lens (SDS-M) is secured using M42.
固定方法

The standard lens (SDS-M) is secured using three-point screws

固定方法

To reduce image distortion

Telecentric lens


Telecentric lenses allow you to obtain images with less distortion.

I experimented with our telecentric lenses RT3 and RT5.


テレセントリックレンズ RT3、RT5 Telecentric lens RT3, RT5
Attach it to the USB camera.
I took a photo of the glass scale.
テレセントリックレンズ RT3 テレセントリックレンズ RT5で撮影
Photographed with telecentric lens RT3 Photographed with telecentric lens RT5
You can see that there is no distortion in the four corners of the screen.
This is the feature of telecentric lenses.


CCTV lens

If you are using a CCTV lens, a telephoto lens will have less distortion than a wide-angle lens.
I experimented with a 6mm fixed focus lens and a 25mm fixed focus lens.


8mm 固定焦点レンズ I attached an 8mm fixed-focus lens to a USB camera and took a picture of graph paper.
方眼紙の四隅が歪んでいる It is evident that the four corners of the graph paper are distorted.


25mm 固定焦点レンズ “I attached a 25mm fixed-focus lens to a USB camera and took a picture of graph paper.”
方眼紙の四隅に歪みがあまり見られません。 There isn’t much distortion observed at the four corners of the graph paper


If it’s a macro lens, some lenses have less distortion depending on their performance, but they tend to be more expensive as a result.


Summary:

– By using a telecentric lens, you can obtain images with minimal distortion.
– The characteristic of a telecentric lens is that there is no distortion even at the four corners of the screen.
– If you are using a CCTV lens, using a telephoto lens rather than a wide-angle lens will result in less distortion.

Types and characteristics of telecentric lenses

Main features of telecentric lenses


1. There is no expansion or contraction of the image within the depth of focus.
→It is possible to reduce measurement errors when measuring dimensions.
2. Less image distortion due to parallax
3. When used in conjunction with coaxial lighting, the brightness of the object is less uneven.
There are two main types of lenses: bilateral telecentric lenses and unilateral telecentric lenses.
We also handle both double-sided and single-sided telecentric lenses.


The characteristics of each are as follows.


Bilateral telecentric lens

両側テレセンリックレンズ


A feature of this camera is that the projected size of the subject remains the same regardless of the distance between the camera sensor and the subject.
In other words, by changing the distance on the camera sensor side using a close-up ring, etc., you can change only the distance between the lens and the subject without changing the magnification.
However, the diameter of the lens is physically larger than the area to be projected, so the lower the magnification, the larger the lens size and the higher the price.
Used in precision measuring equipment and projectors.


両側テレセンリックレンズ   両側テレセントリックレンズ
RT1 RT3 RT5


Unilateral telecentric lens

片側テレセントリックレンズ


This lens has a telecentric lens structure only on the subject side.
Unlike a double-sided telecentric lens, when the distance to the camera sensor side changes, the size of the subject will change, just like a non-telecentric lens.
The lens is smaller and less expensive than a double-telecentric lens.
If changing the magnification like a macro zoom lens is not necessary for dimension measurement purposes, it may be used as a fixed magnification replacement.


(In addition to the subject-side telecentric lenses that we handle, there are also image-side telecentric lenses that have a telecentric lens structure only on the camera sensor side.
This is rarely used when photographing workpieces using a regular camera. )


片側テレセントリックレンズ  

テレセントリックレンズ(W.D.65mmタイプ)


テレセントリックレンズ(W.D.110mmタイプ)

     
片側テレセントリックレンズ  

テレセントリックレンズ(同軸照明対応・W.D.65mmタイプ)


テレセントリックレンズ(同軸照明対応・W.D.110mmタイプ)

     
片側テレセントリックレンズ  

メガピクセル対応テレセントリックレンズ(W.D.65mmタイプ)


メガピクセル対応テレセントリックレンズ(W.D.110mmタイプ)

     
メガピクセル対応テレセントリックレンズ  

メガピクセル対応テレセントリックレンズ(同軸照明対応・W.D.65mmタイプ)


メガピクセル対応テレセントリックレンズ(同軸照明対応・W.D.110mmタイプ)


Special telecentric lens

■Long distance telecentric lens


特殊なテレセントリックレンズ01   特殊なテレセントリックレンズ02


A distance of 170 mm can be secured from the tip of the lens to the object.

At this level of magnification, there is not much difference in resolution compared to our zoom lens.

This is effective if you really want to make the lens and camera smaller.


telecentric lens


(Working distance:170mm)

TG lens + 0.5x auxiliary lens

(focal length: 170mm)

特殊なテレセントリックレンズ03 特殊なテレセントリックレンズ04


■Space-saving, high-magnification telecentric lens


特殊なテレセントリックレンズ05   特殊なテレセントリックレンズ06


The lens is small and the focal length is short at 40mm, making it convenient for installation in tight spaces.

Although the magnification is high, the resolution is lower compared to our zoom lens.


Space-saving, high-magnification telecentric lens

FZ lens + 2x auxiliary lens

特殊なテレセントリックレンズ07 特殊なテレセントリックレンズ08
(⇓Enlarge the red frame above) (⇓Enlarge the red frame above)
特殊なテレセントリックレンズ09 特殊なテレセントリックレンズ10

2Kigou pitch discrimination and number discrimination are not possible with a telecentric lens.


(Reference) When viewed with our highest resolution lens, it looks like the following.


特殊なテレセントリックレンズ11


Summary


The main features of telecentric lenses are

1. Since there is no expansion or contraction of the image within the depth of focus, measurement errors can be reduced when measuring dimensions.
2. Less image distortion due to parallax
3. When used in conjunction with coaxial lighting, the brightness of the object is less uneven.

And so on.

Double-sided telecentric lenses used in precision measurement equipment and projectors.
There are single-sided telecentric lenses, which have a telecentric lens structure only on the subject side.
Double-sided telecentric lenses are large and expensive, while single-sided telecentric lenses are small and relatively inexpensive.

Góc nhìn của ống kính là gì ?


Chỉ số thể hiện phạm vi của cảnh được chụp bằng camera, thường được diễn đạt dưới dạng góc độ. Được gọi là góc nhìn hoặc góc nhìn của ống kính.

Khi chụp một đối tượng, việc xác định góc nhìn của ống kính là rất quan trọng. Góc nhìn này phụ thuộc vào tiêu cự của ống kính và kích thước góc nhìn của camera.


Trong tài liệu mô tả ống kính, phạm vi của hình ảnh khi camera được cầm ở tư thế ngang được biểu thị bằng góc nhìn theo chiều ngang, dọc và đường chéo. Nếu chỉ có một con số được ghi, đó là góc nhìn theo đường chéo.

Các ống kính có góc nhìn rộng được gọi là ống kính góc rộng, trong khi các ống kính có góc nhìn hẹp được gọi là ống kính tele.


The difference between back focus and flange back?

Q: What is back focus


A: Back focus refers to the distance from the rear end of the lens to the focal plane (the imaging sensor of the camera).


If the back focus is misaligned, it will result in a focus shift.


Q: What is flange back?


A: Flange back refers to the distance from the lens mount’s mounting surface to the imaging sensor.


There can be confusion between flange back and back focus, but they are distinct concepts.

The distance from the camera’s C-mount to the imaging sensor surface (flange back) may vary slightly depending on the camera. Therefore, when changing lenses or cameras, it may be necessary to adjust the back focus.
(We ship products that combine cameras and lenses with precise adjustments.)
Additionally, for lenses with a back focus adjustment mechanism, customers can also make fine adjustments themselves.

We also offer lenses with a back focus adjustment mechanism as optional accessories.


Back focus mechanism lens SDS-M19

For detailed product information, please contact our technical support.

Cameras and lenses can’t just be left anywhere; they need to be stored properly.
If you do not store it correctly, it may cause problems such as dust contamination and mold growth.
This time, we will introduce how to store your camera and lenses.


●Precautions when storing cameras and lenses

Things to be careful about when storing cameras and lenses are dust and moisture.
If dust gets into the lens or camera sensor, it cannot be cleaned easily and can cause glare when taking pictures.
In addition, moisture can cause the lenses to become cloudy and cause mold to grow.
If dust gets inside the camera or lens, and if it becomes moldy, the only option is to disassemble it and clean it, so it is important to prevent mold from forming.
Additionally, camera and lens cleaning (removal of dust and mold) is not covered by the manufacturer’s warranty. If you request repairs, the repair costs will be considerable.
(Items are covered by our manufacturer’s warranty immediately after purchase.)
Therefore, it is necessary to store it carefully to avoid dust and moisture.


●What is the best storage method?

Inside cupboards, drawers, and on desks, there is a high risk of dust and mold.
Even if it’s in your camera bag, there are risks.
Generally, the optimum humidity for storing cameras and lenses is said to be around 40-50%.
Humidity exceeding 60% can cause mold to grow, and even in environments with extremely low humidity.
I can’t say it’s good. Therefore, it is necessary to maintain proper humidity.
Also, extreme temperature differences can lead to condensation, so you need to be careful about temperature differences as well.


①Prepare a case to store your camera and lenses


First, prepare a case (container) to store your camera and lenses.
Placing it in a case will prevent dust from entering, and sealing it will also prevent moisture from entering.
Cases include the following。


~Dry box (moisture proof)~


A specialized moisture-proof storage for storing cameras and optical products. They range from small types to large cabinet-type types.
You can store it with peace of mind as it always maintains stable humidity.
It seals and protects it from moisture and dust.


防湿保管庫  Homepage of Toyo Living Co., Ltd., a manufacturer of moisture-proof storage cabinets
https://www.toyoliving.co.jp/products-info/ED-80CATP2B-1.html  


~Simple dry box or sealed container~


Simple dry boxes are popular and easy to use.
A sealed moisture-proof case sold by camera accessory manufacturers.
You can also check the humidity by putting a desiccant inside and a simple hygrometer.
Even beginners can easily store their cameras and lenses.
You can also use airtight food containers with rubber gaskets on the lids, which are now available at 100 yen shops and home centers.
Although it can easily protect against moisture and dust at low cost, it requires frequent humidity checks and replacement of the desiccant.


簡易ドライボックス  


②Prepare desiccant


A simple dry box or airtight food container is a container, and it is necessary to add a desiccant to reduce humidity.
Commercially available desiccant for dry boxes or food-grade silica gel can also be used instead.
Be sure to include a desiccant agent and a hygrometer to check the humidity.


シリカゲル


③Clean thoroughly before storing


Cameras and lenses that have been used have dust attached to them.
Clean thoroughly before storing.
There is no point in storing your camera or lens in an enclosed space if you introduce dirt into it.


④Cleaning and cleaning of the camera and lens


Blow away dust and dust from the camera and lens using a blower sold by camera accessory manufacturers.
Also, wipe off any dirt or oil on the surface with a cleaning cloth.
Wipe off sweat and oil from your hands, as this is a source of nutrients for mold.


Should the lens be removed from the camera?


It is up to you whether or not to remove the lens when storing it, but there is no problem if you store it with the lens attached.
However, the more frequently you replace or remove lenses, the greater the risk of dust getting into them.
Also, when removing the lens, put a cap on the camera lens mount and store it.


●Temporary storage of cameras and lenses


Care must also be taken when storing the camera temporarily, such as while changing lenses.
Even if you can’t see it, dirt, dust, dirt, etc. are floating in the air.
You can tell because dust accumulates on shelves at home.
Replacing lenses is a time when there is a high risk of dust and dirt getting inside.
Therefore, you need to pay attention to how you place your camera and lens.


カメラ、レンズの一時保管 The camera sensor is exposed and facing the top, and dust falls onto the sensor inside the camera.  
カメラ、レンズの一時保管 The lens C mount is exposed and faces toward the top, and dust falls onto the lens.
カメラ、レンズの一時保管 The object side of the lens is exposed and faces toward the top, and dust falls onto the lens.


Cameras and lenses may come with a cap (lid) at the time of purchase.
By attaching the cap as soon as possible, you can reduce the risk of dust getting in.
Also, be careful when placing the lens on the desk when replacing it.
Instead of placing the sensor or lens facing towards the top, place it horizontally to prevent dust from falling.


カメラ、レンズの一時保管 The camera sensor is placed horizontally, but there is still a medium risk. It is advisable to put on the cap immediately.
カメラ、レンズの一時保管  The lens surface is placed horizontally, but the risk is still medium. It is advisable to put on the cap immediately.
   
カメラ、レンズの一時保管  Caps on both ends of the lens Attach the caps to the camera

●Summary of how to store cameras and lenses


・Be careful of dust and moisture on your camera and lens.
・If dust or mold grows on the camera or lens, it is difficult to remove it.
Therefore, store it in an environment that does not generate dust or mold.
– Store in a special case to prevent dust and mold from growing.
・Carefully take care of your camera and lens to remove dust, dirt, and oil before storing them.
Please do not bring it in.
・No problem if you leave the lens on
– Be careful when storing temporarily or changing lenses.

4K Zoom Lens (Intermediate Mgnification) SDS-KFZ

● High-resolution zoom lens compatible with 4K cameras

● Zoom ratio of 10! (Optical magnification x0.5-x5.0)

    Covering a wide range of magnifications

● Compatible with C-mount cameras up to 2/3 inch sensor size

● Lens diameter: φ50mm

We also offer high-resolution 4K microscopes equipped with this lens.

Accessory to extend the focal length of a microscope

There is an option called the ‘0.5x auxiliary lens’ that approximately doubles the operating distance. (Please note that some models may not have the option of auxiliary lenses available.)


標準レンズ用0.5倍補助レンズ TG-0.5
0.5x Auxiliary Lens for Standard Lens: TG-0.5

<Changes in Operating Distance>
* With the optional 0.5x auxiliary lens (TG-0.5) for the standard lens:


Without TG-0.5
(installed on TG500CS)
With TG-0.5
(installed on TG500CS)
Working distance
90mm
160mm


When using the 0.5x auxiliary lens, the operating distance becomes longer, and the distance between the lighting and the object also increases. Therefore, it is necessary to use the lighting LED angle (bottom: LED-A2) to fix the lighting near the object.


LEDアングル(LED-A2) LEDアングル(LED-A2)取付例
LED angle(LED-A2) Mounting Example

If you have any questions, please feel free to contact technical support.”