■Focusing
Focusing during microscope shooting is not a microscope eyepiece but please go while watching the camera’s LCD screen. (It will be a viewfinder on cameras without live view function.)
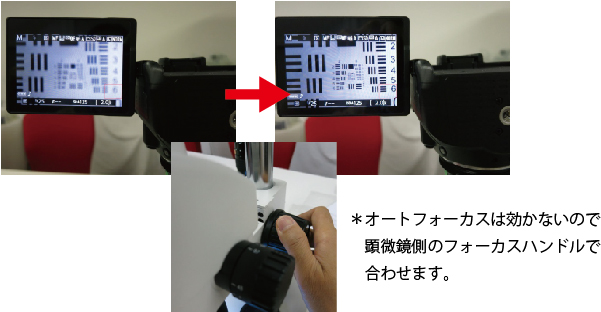
*auto focus function of camera doesn’t work at this time. so please adjust a focus with using focus angle of stereo microscope.
Even if you focus on an eyepiece, it usually does not match the focus of the camera.
(If there is diopter adjustment or back focus on the microscope, tonality may be possible.)
■Vibration reduction
It will be like a picture blurred when you shake hands.
To prevent camera vibration, please use remote control or set the time settings.
For cameras with low vibration mode, set the low vibration mode to ON (about 1 second).
■Exposure adjustment
The exposure priority mode (dial A) is easy when shooting. If the monitor is too dark or too bright, please adjust the light / dark control (±).
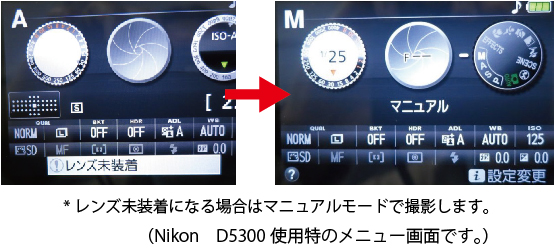
Depending on the camera, “lens unmounted” may become occasionally.
In this case, shoot in manual mode.
(In this case, the brightness is adjusted by the shutter speed.)
■White balance
Please manually adjust if the image becomes reddish or blue-colored due to the color of the light source of the microscope.
Make the light source of the microscope proper, remove the specimen, set it to nothing on the screen (glass part without specimen in the case of a biological microscope, white or gray board in case of a stereomicroscope), set the screen to white I will let you recognize.
※ Please see the operation manual of the camera for detailed operation.
■ISO sensitivity
If the ISO sensitivity is too high, the image quality will degrade. If the screen is dark, you can take a beautiful image by using some method such as brightening the light of the microscope or slowing down the shutter speed, setting the sensitivity to a lower setting and shooting.